Eino Dev 可视化调试插件功能指南
简介
💡 使用该插件可以对使用 Eino 框架编写的编排产物(Graph,Chain)进行可视化调试,包括:
- 编排产物可视化渲染;
- 从可操作的任意节点开始,mock 输入进行调试。
快速开始
下载 eino-example
# HTTPS
git clone https://github.com/cloudwego/eino-examples.git

# SSH
git clone git@github.com:cloudwego/eino-examples.git
安装依赖
在项目目录下依次执行以下指令
# 1. Pull latest devops repository
go get github.com/cloudwego/eino-ext/devops@latest

# 2. Cleans and updates go.mod and go.sum
go mod tidy
运行 Demo
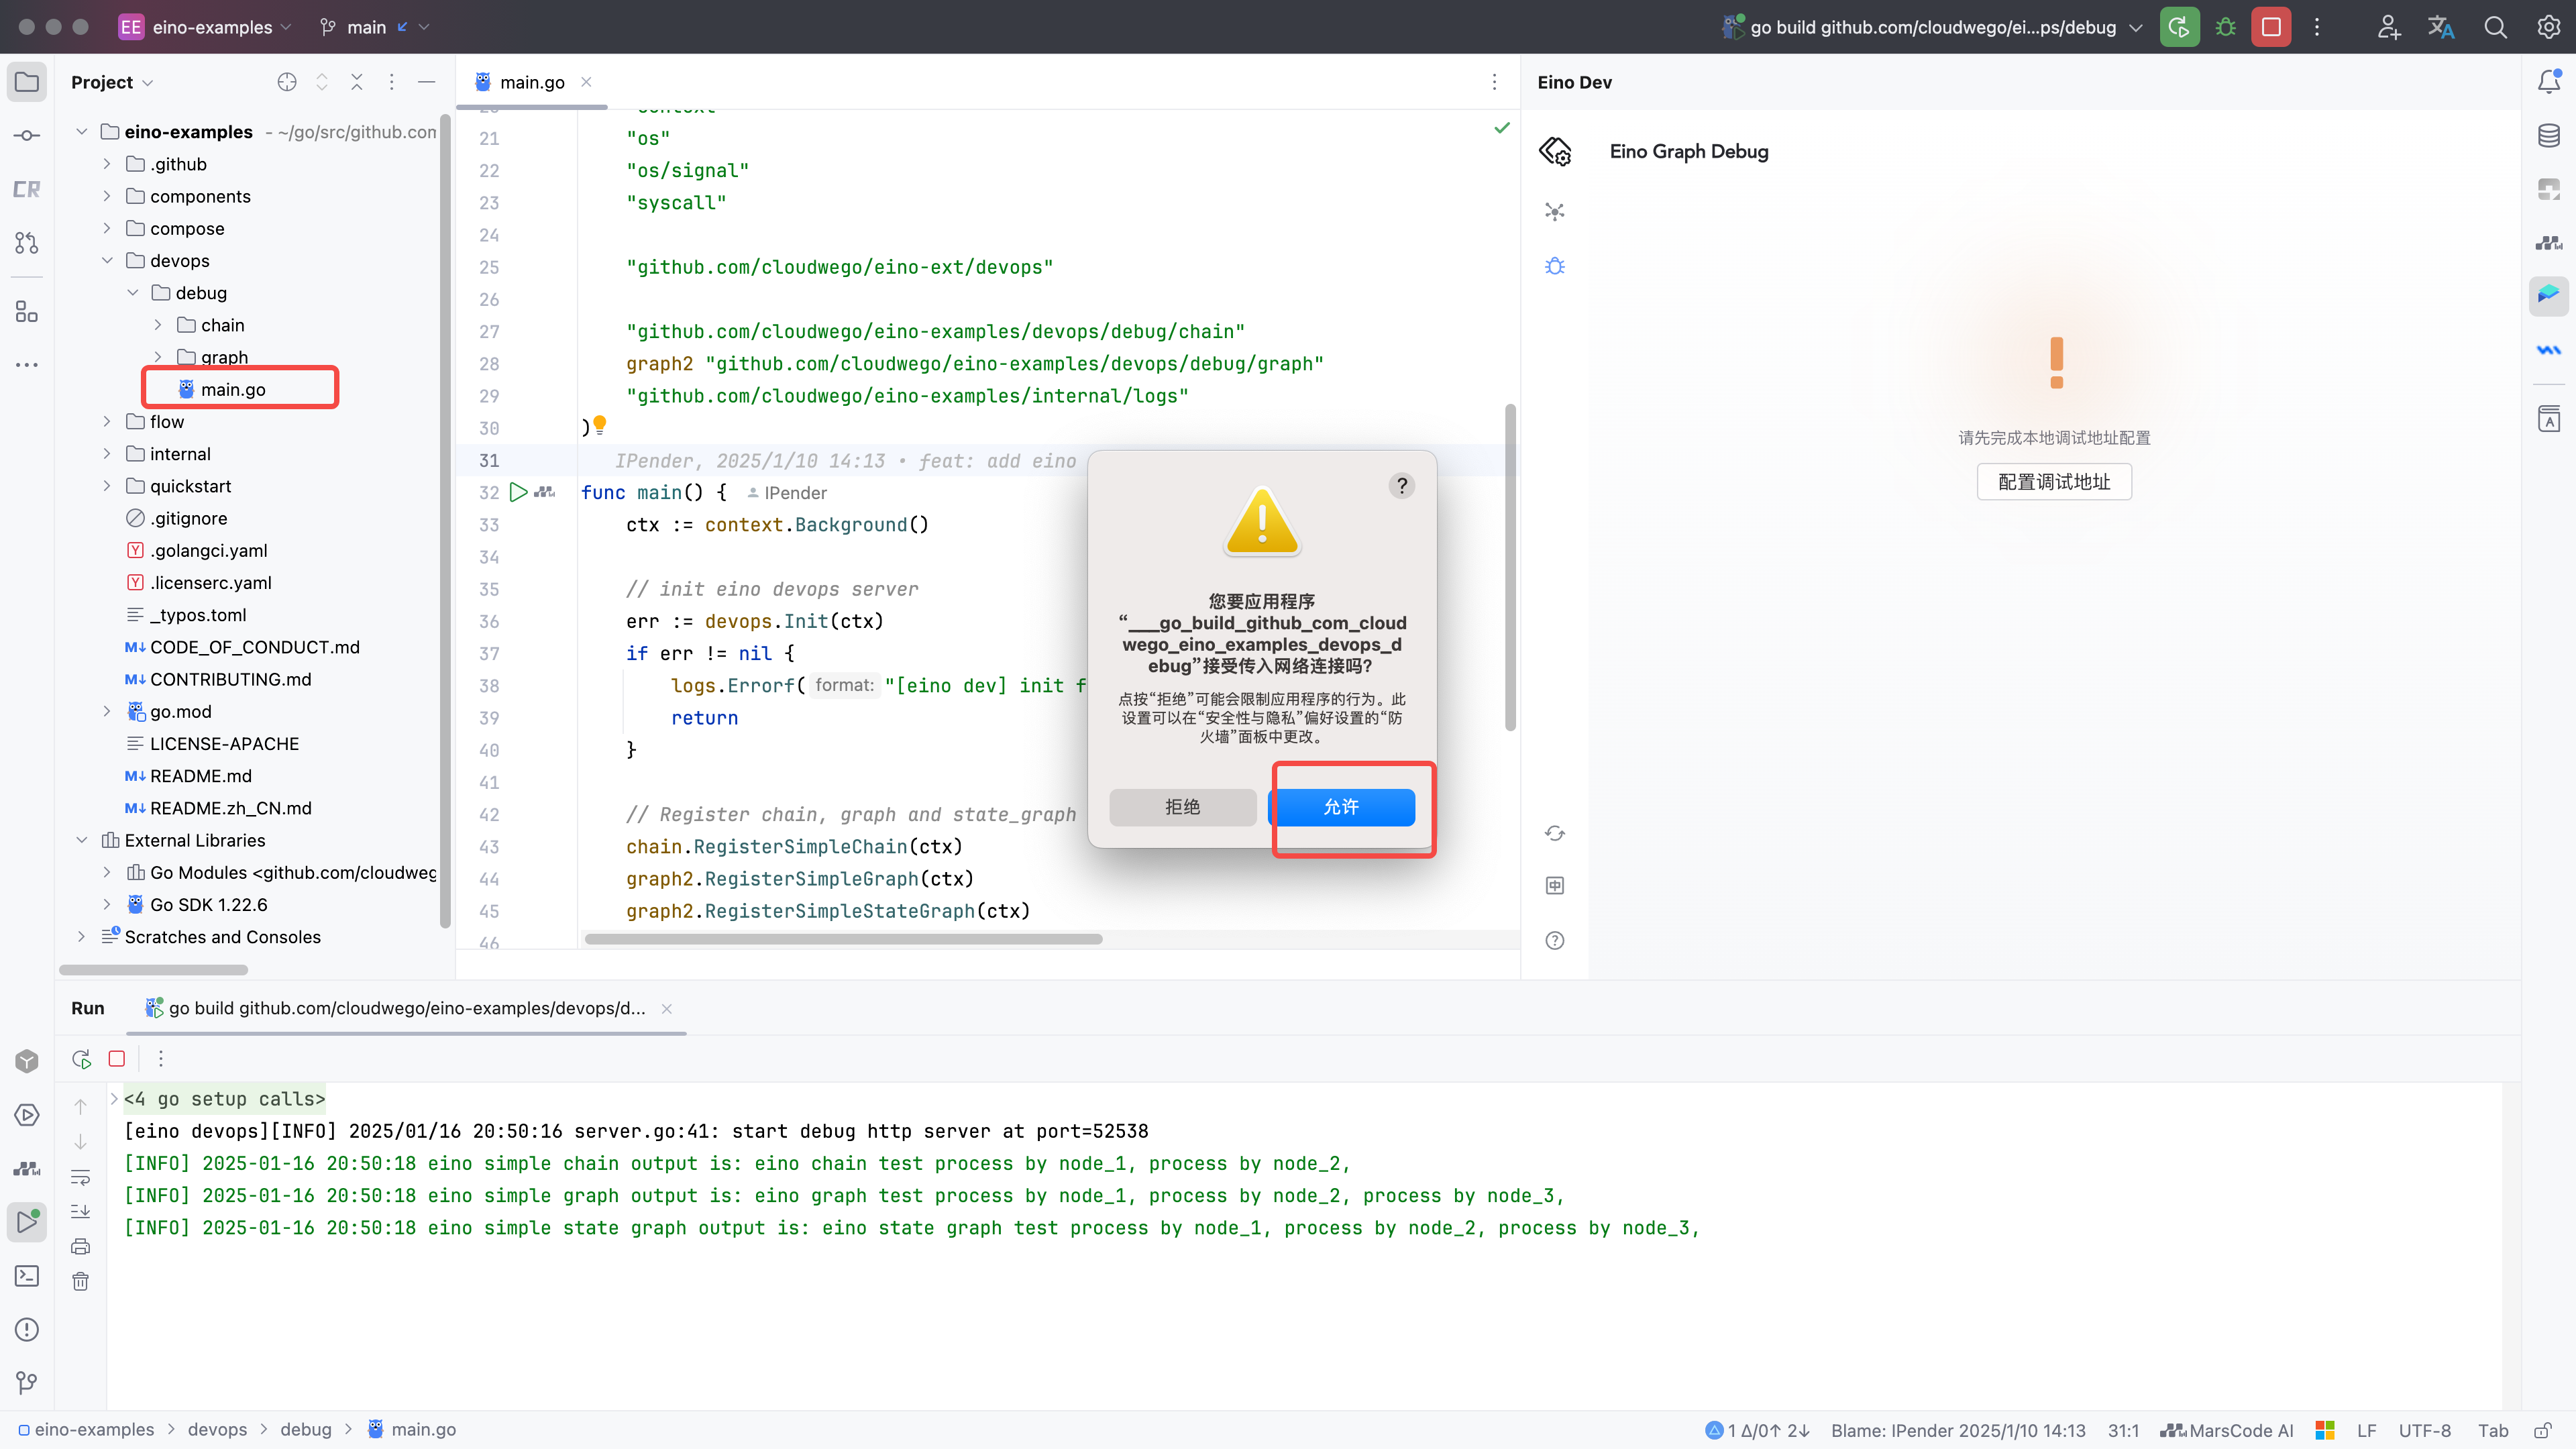
进入 eino-examples/devops/debug/main.go,运行 main.go。因为插件会同时在本地启动一个 HTTP 服务用于连接用户服务进程,所以会弹出接入网络警告,点击允许。
配置调试地址
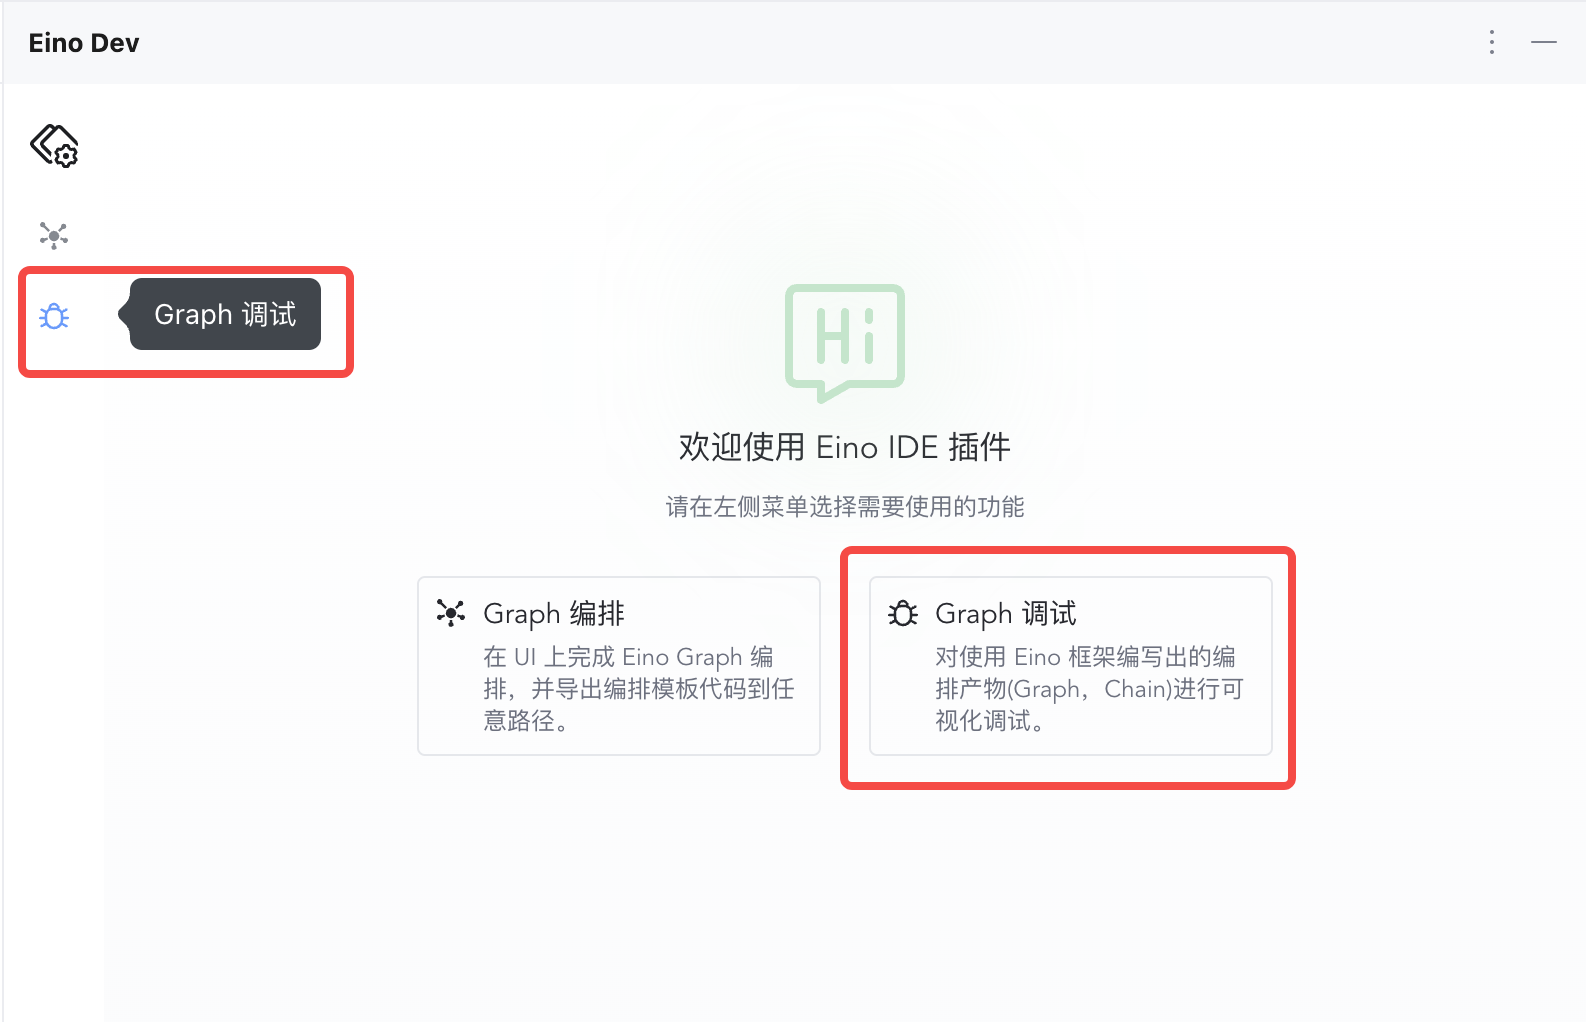
1.点击左侧或正中间调试功能进入调试配置
 | 2.点击配置调试地址
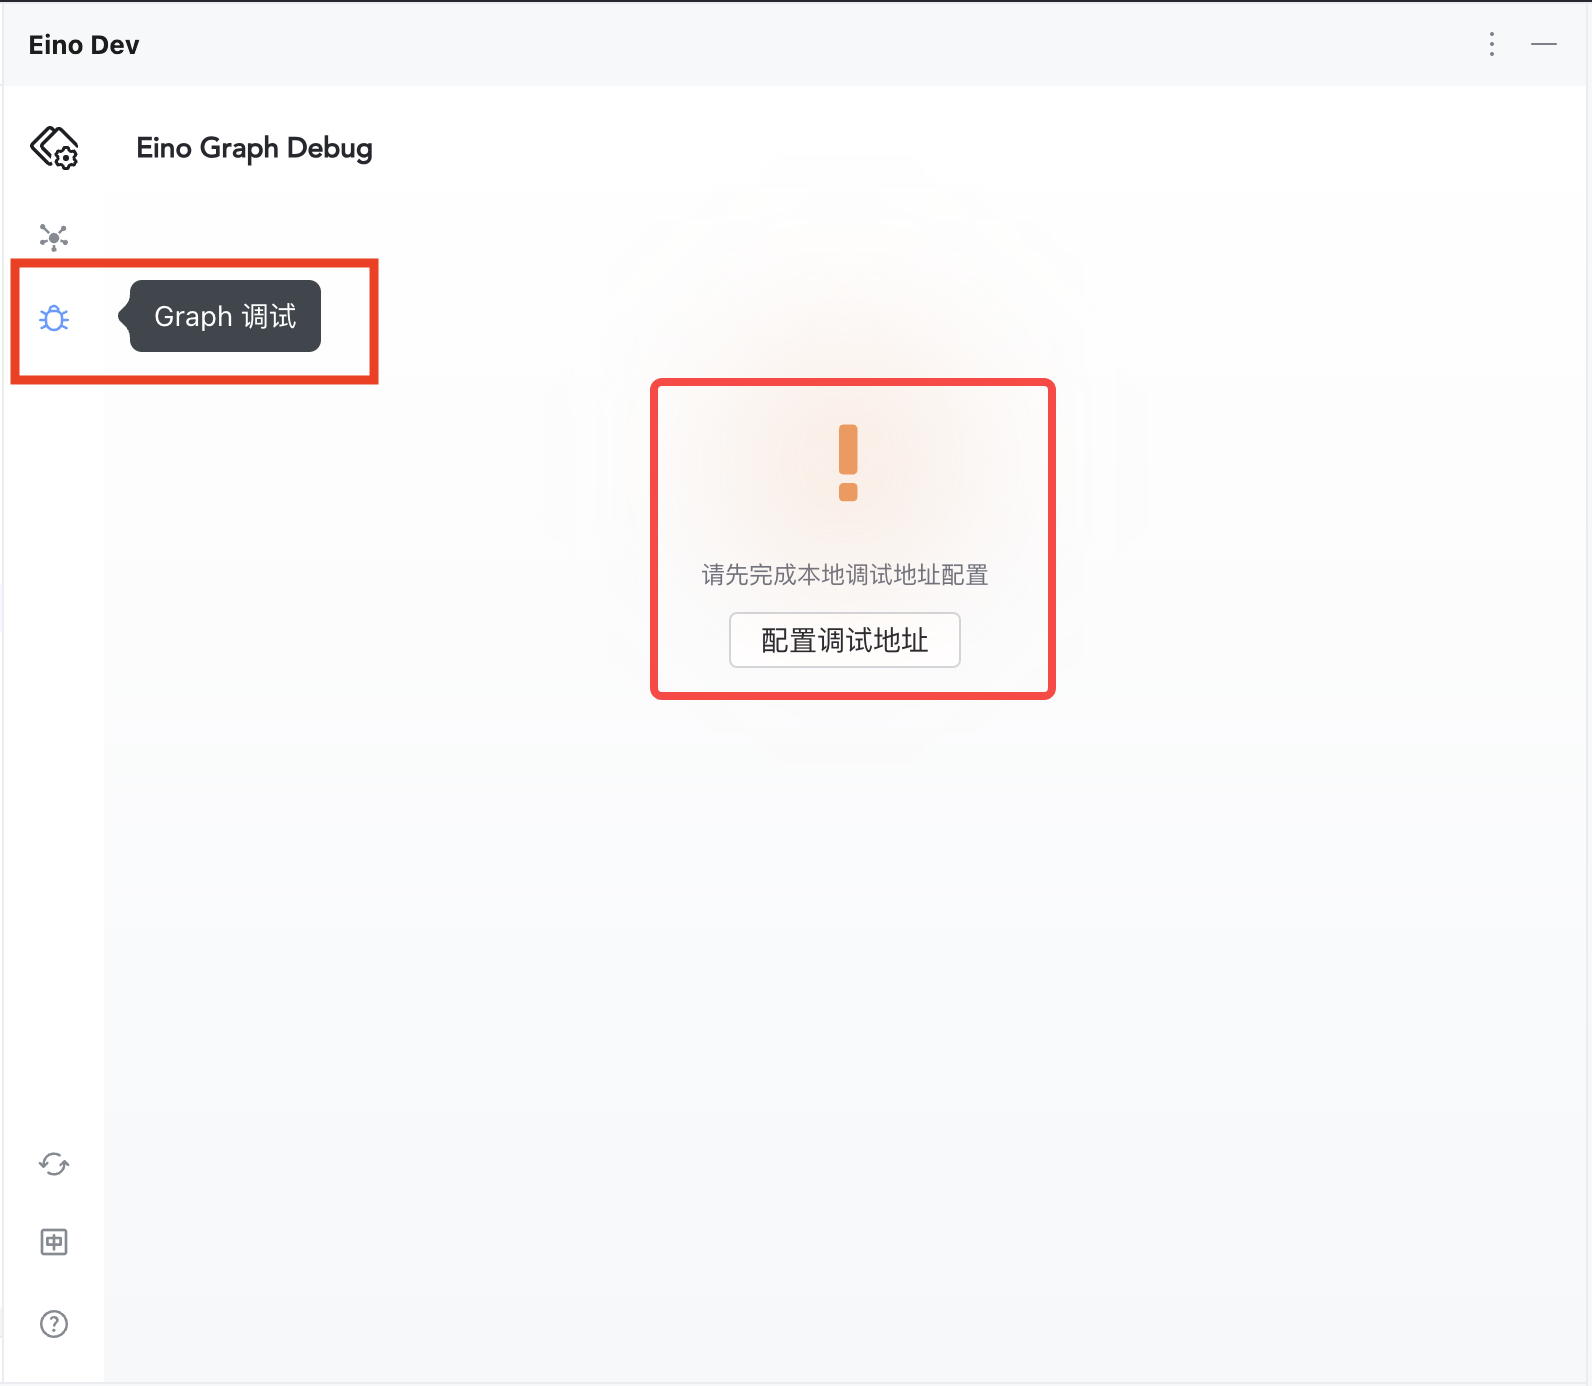 |
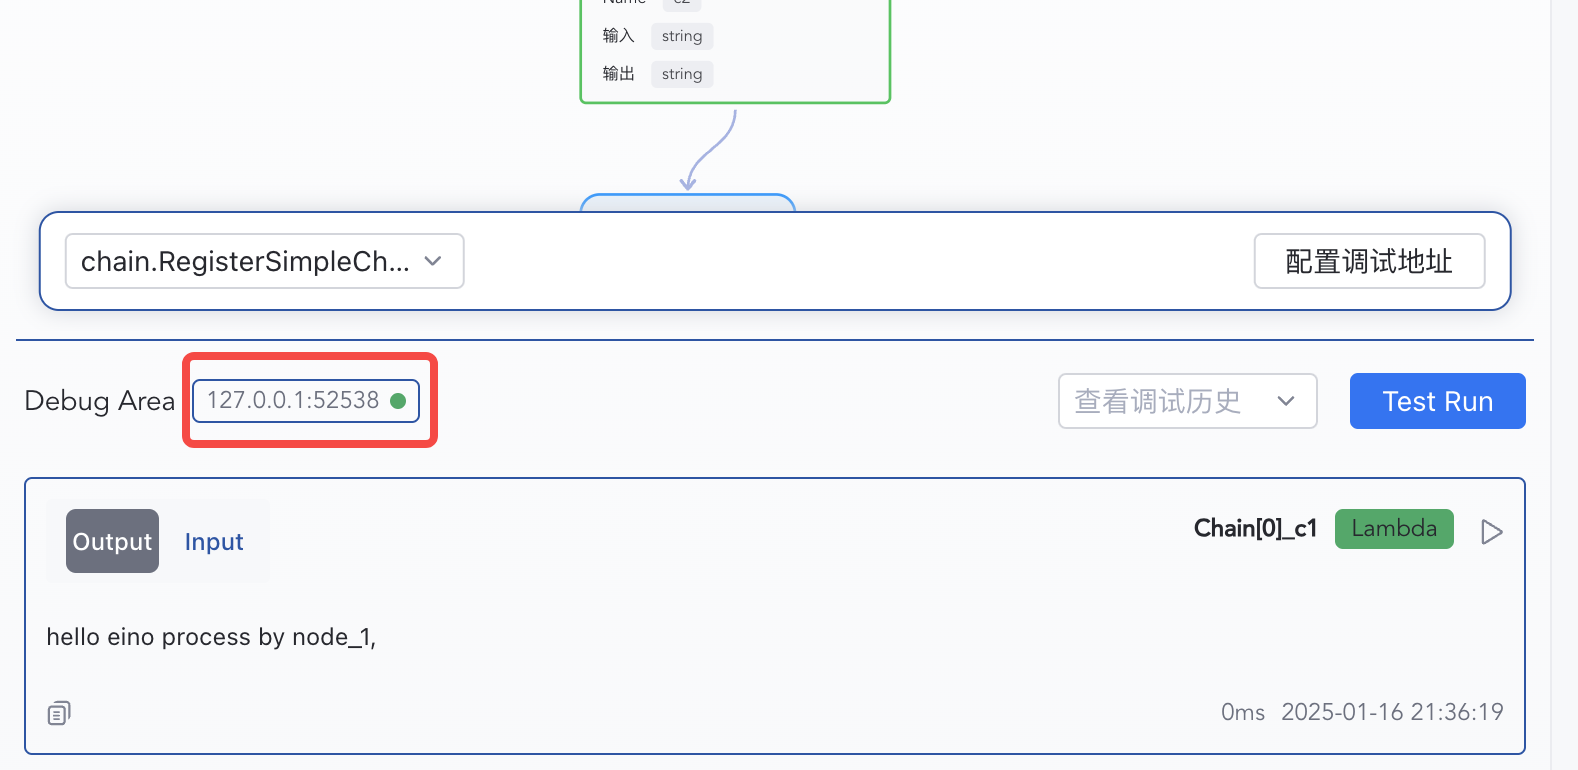
3.填入 127.0.0.1:52538
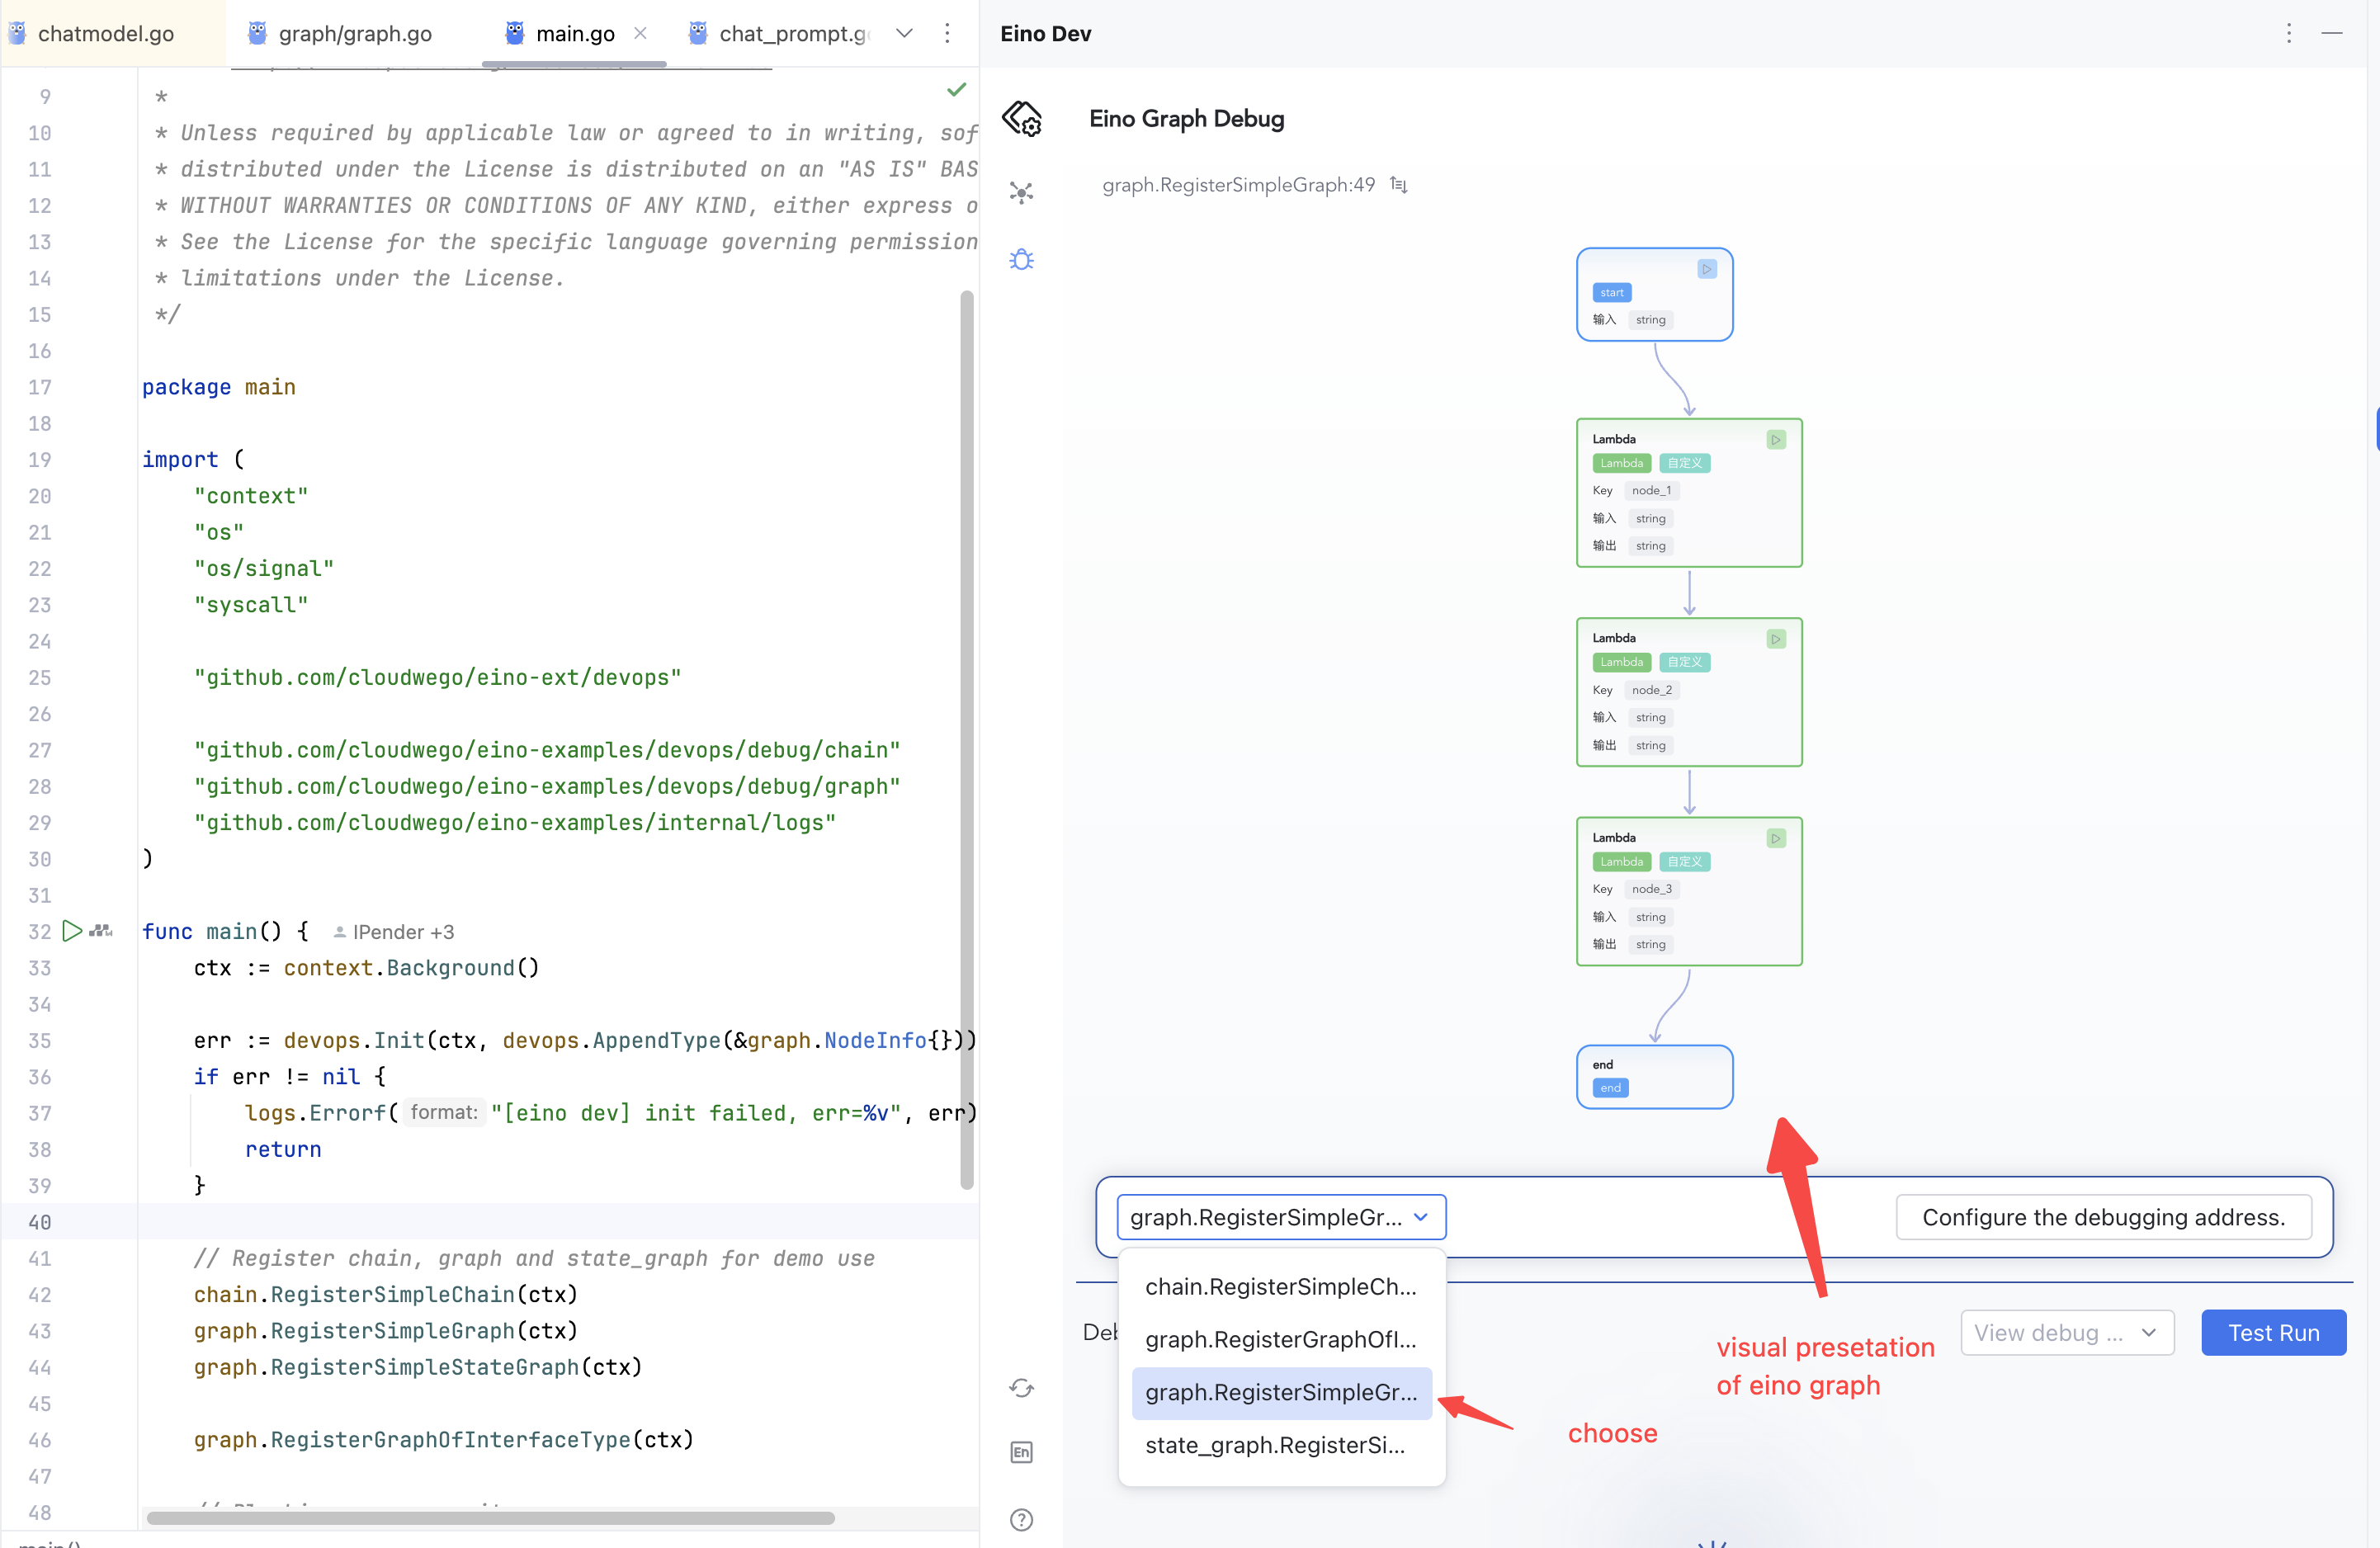
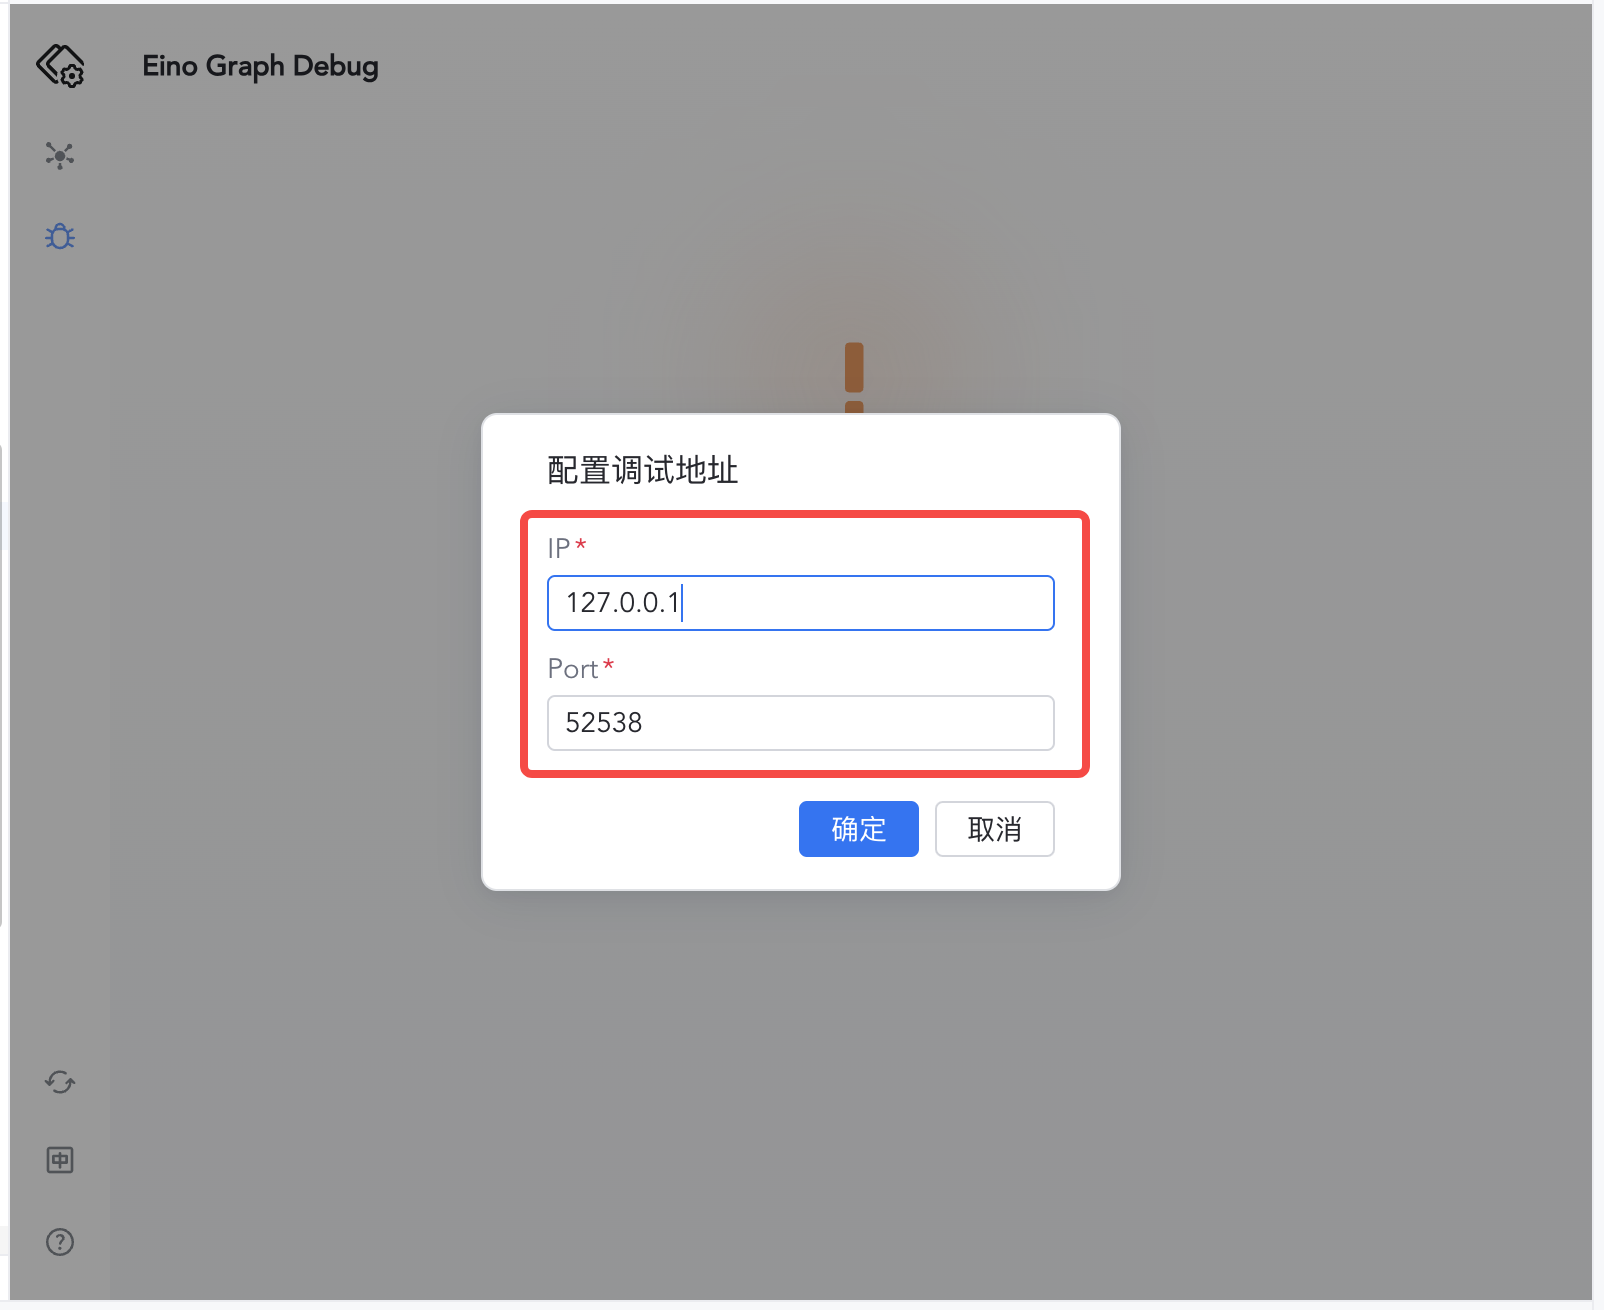 | 4.点击确认进入调试界面,选择要调试的Graph
 |
开始调试
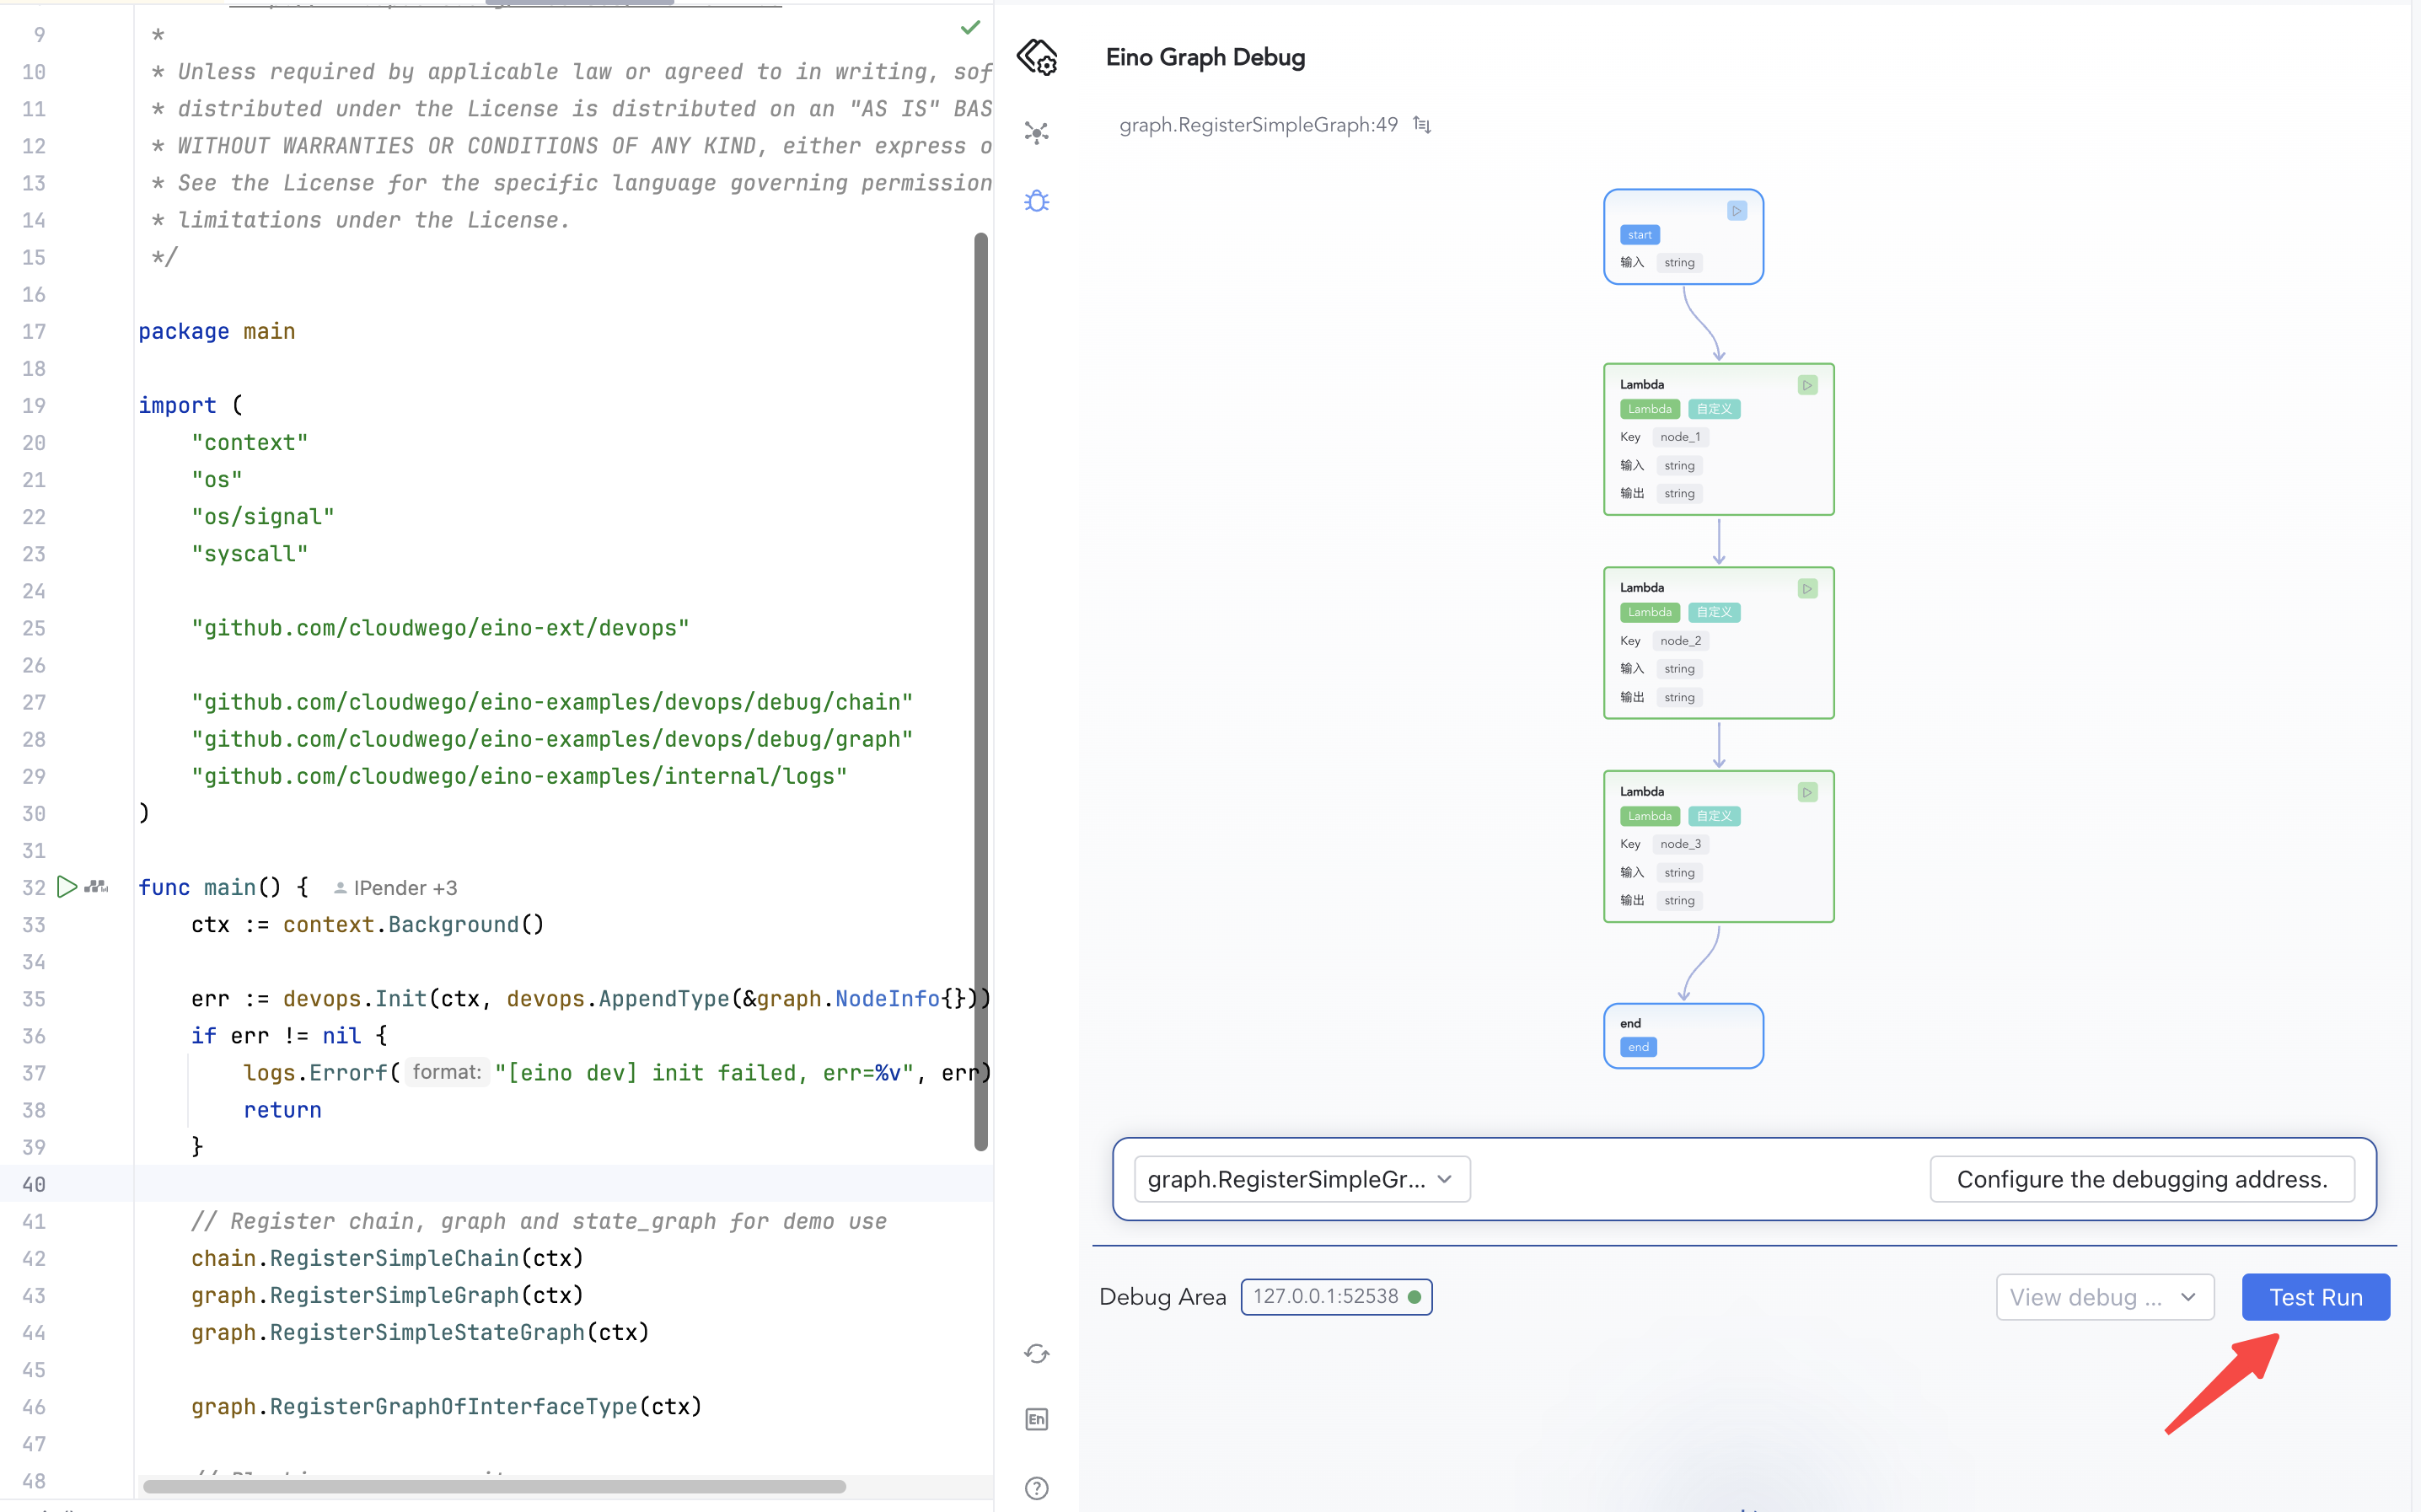
1.点击「Test Run」从 start 节点开始执行
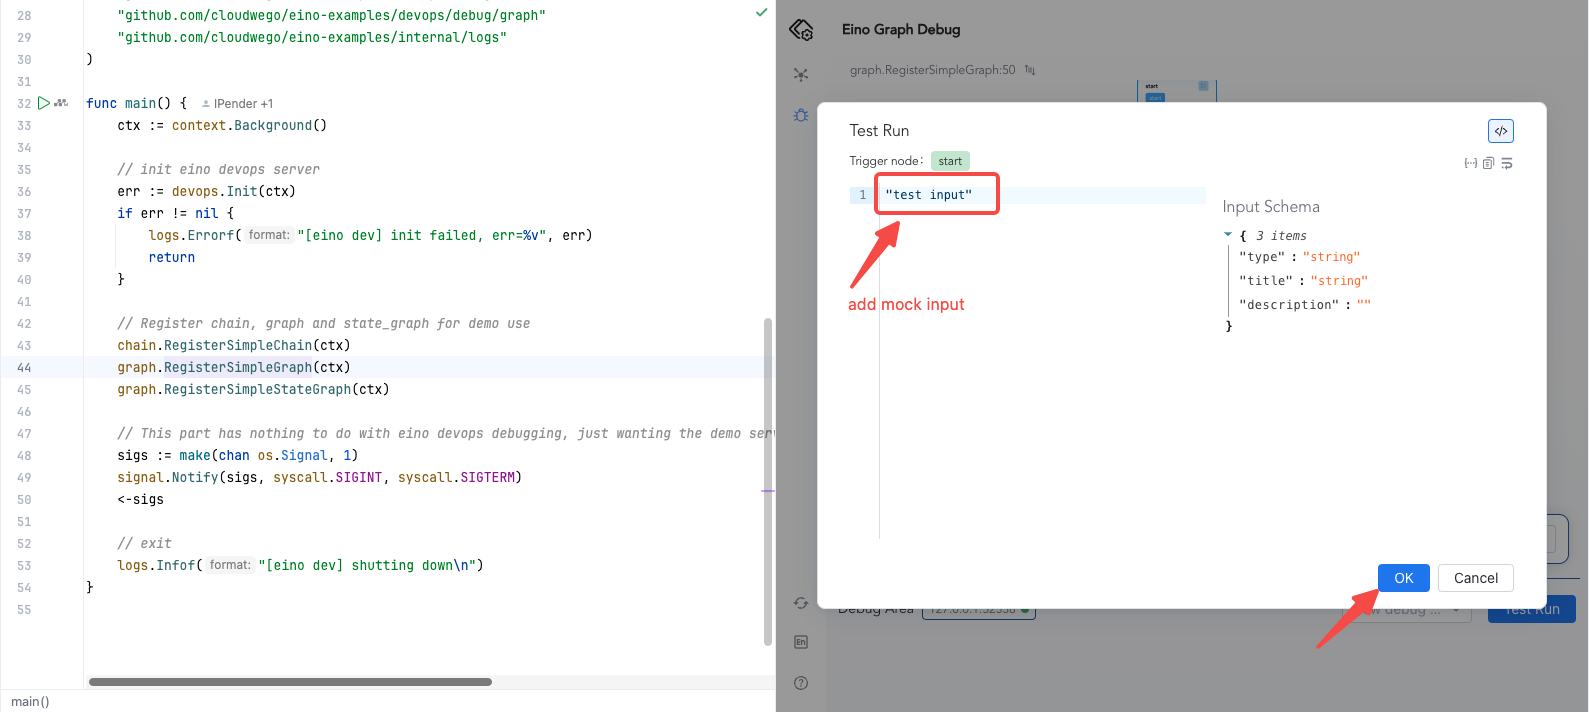
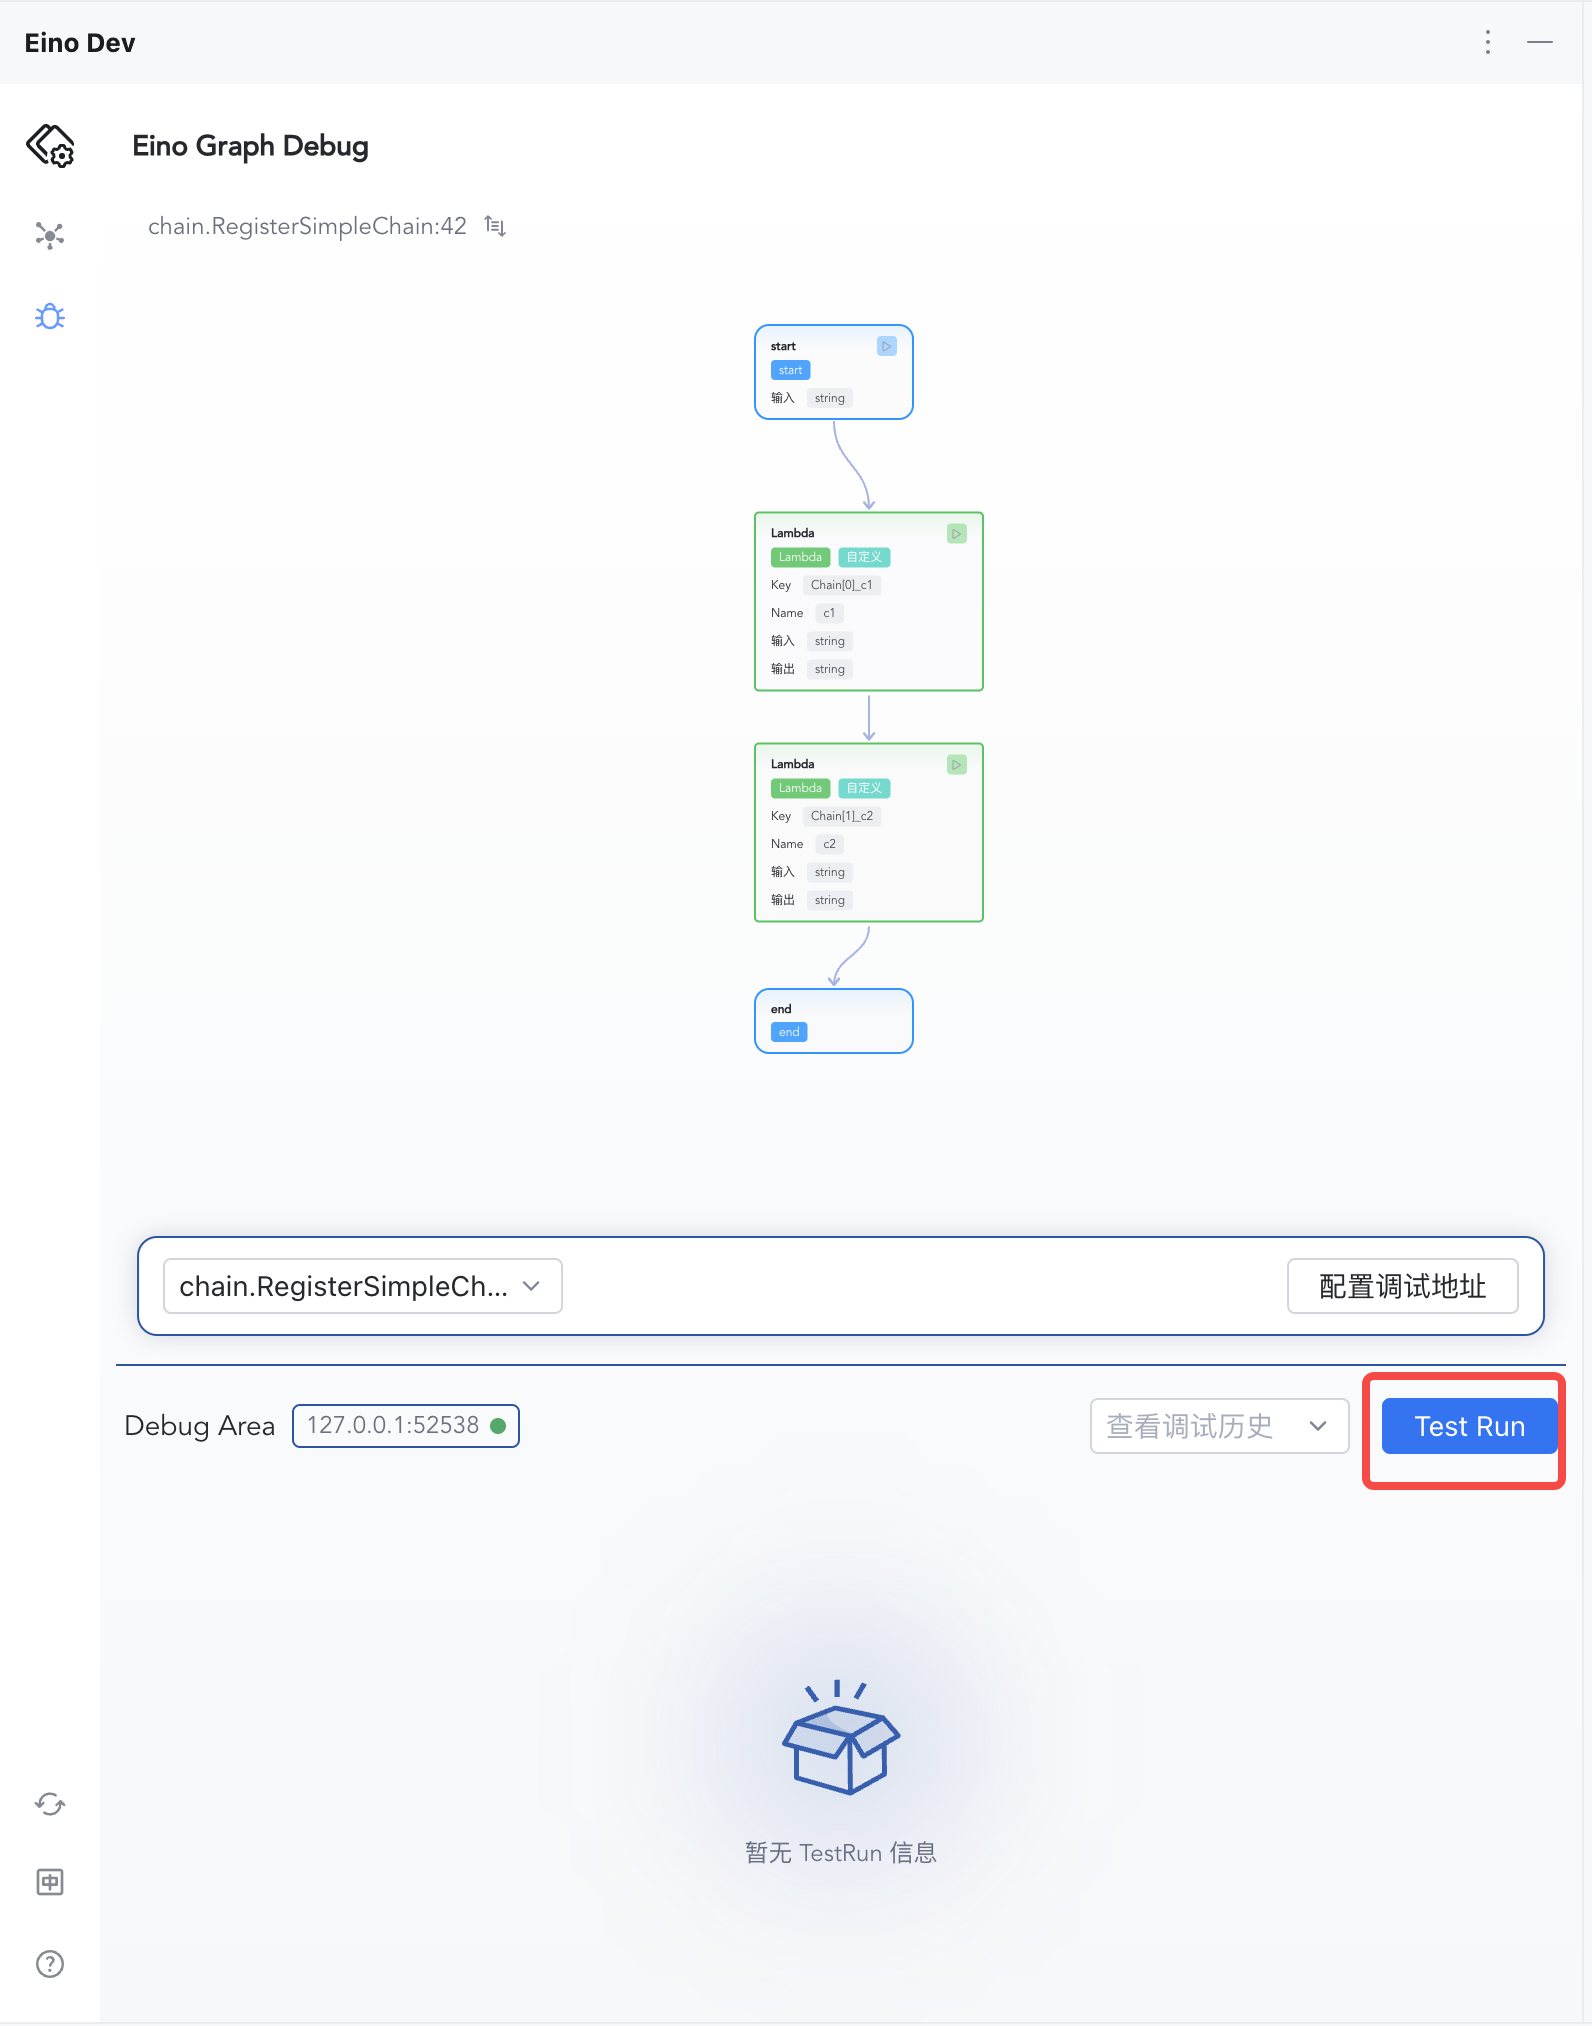 | 2.输入 "hello eino",点击确认
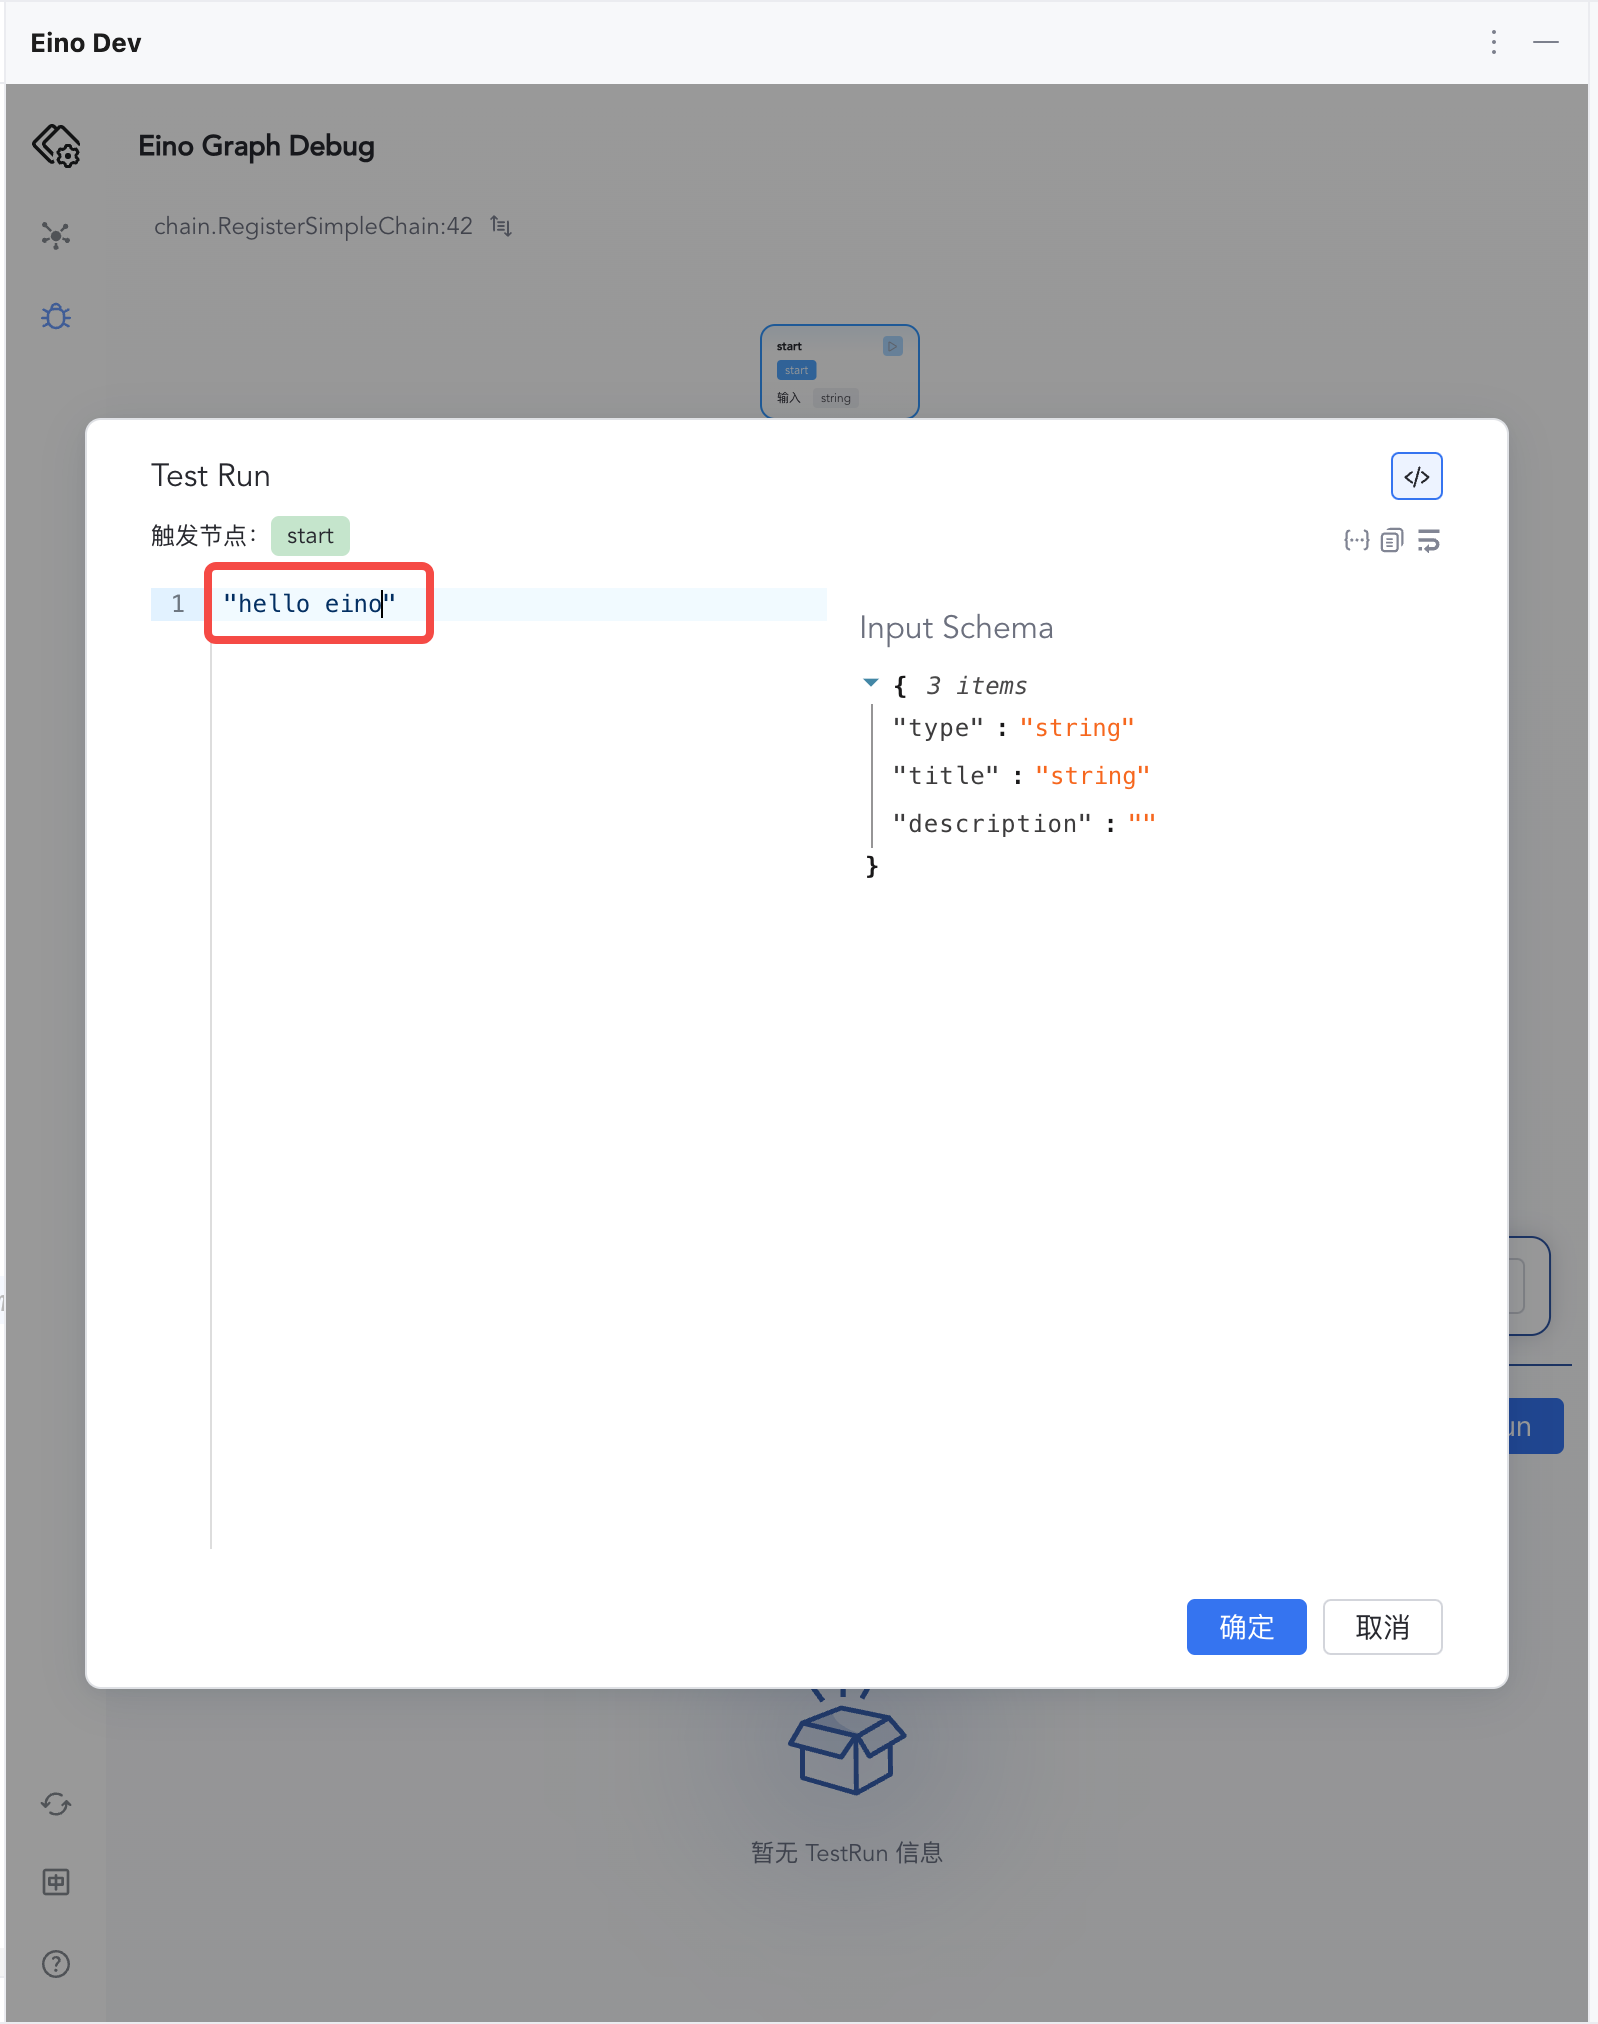 |
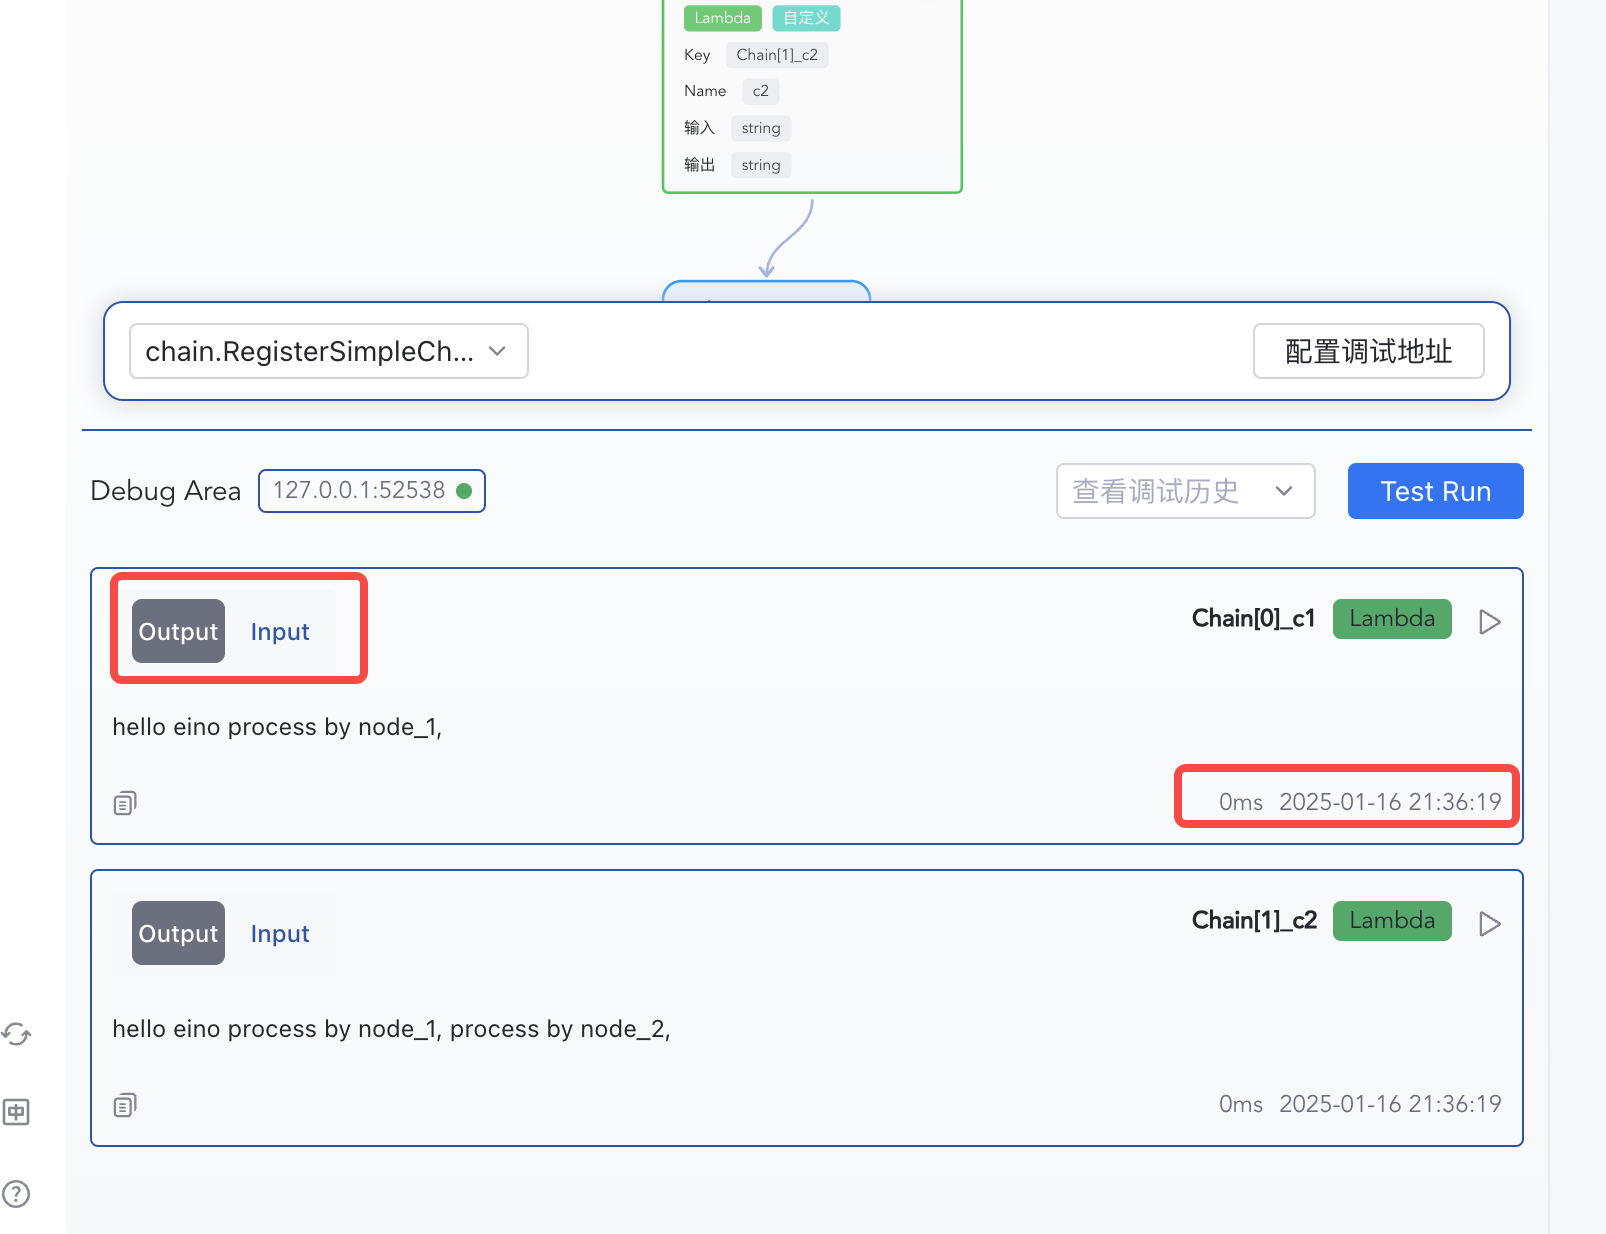
3.在调试区域展示有各个节点的输入和输出
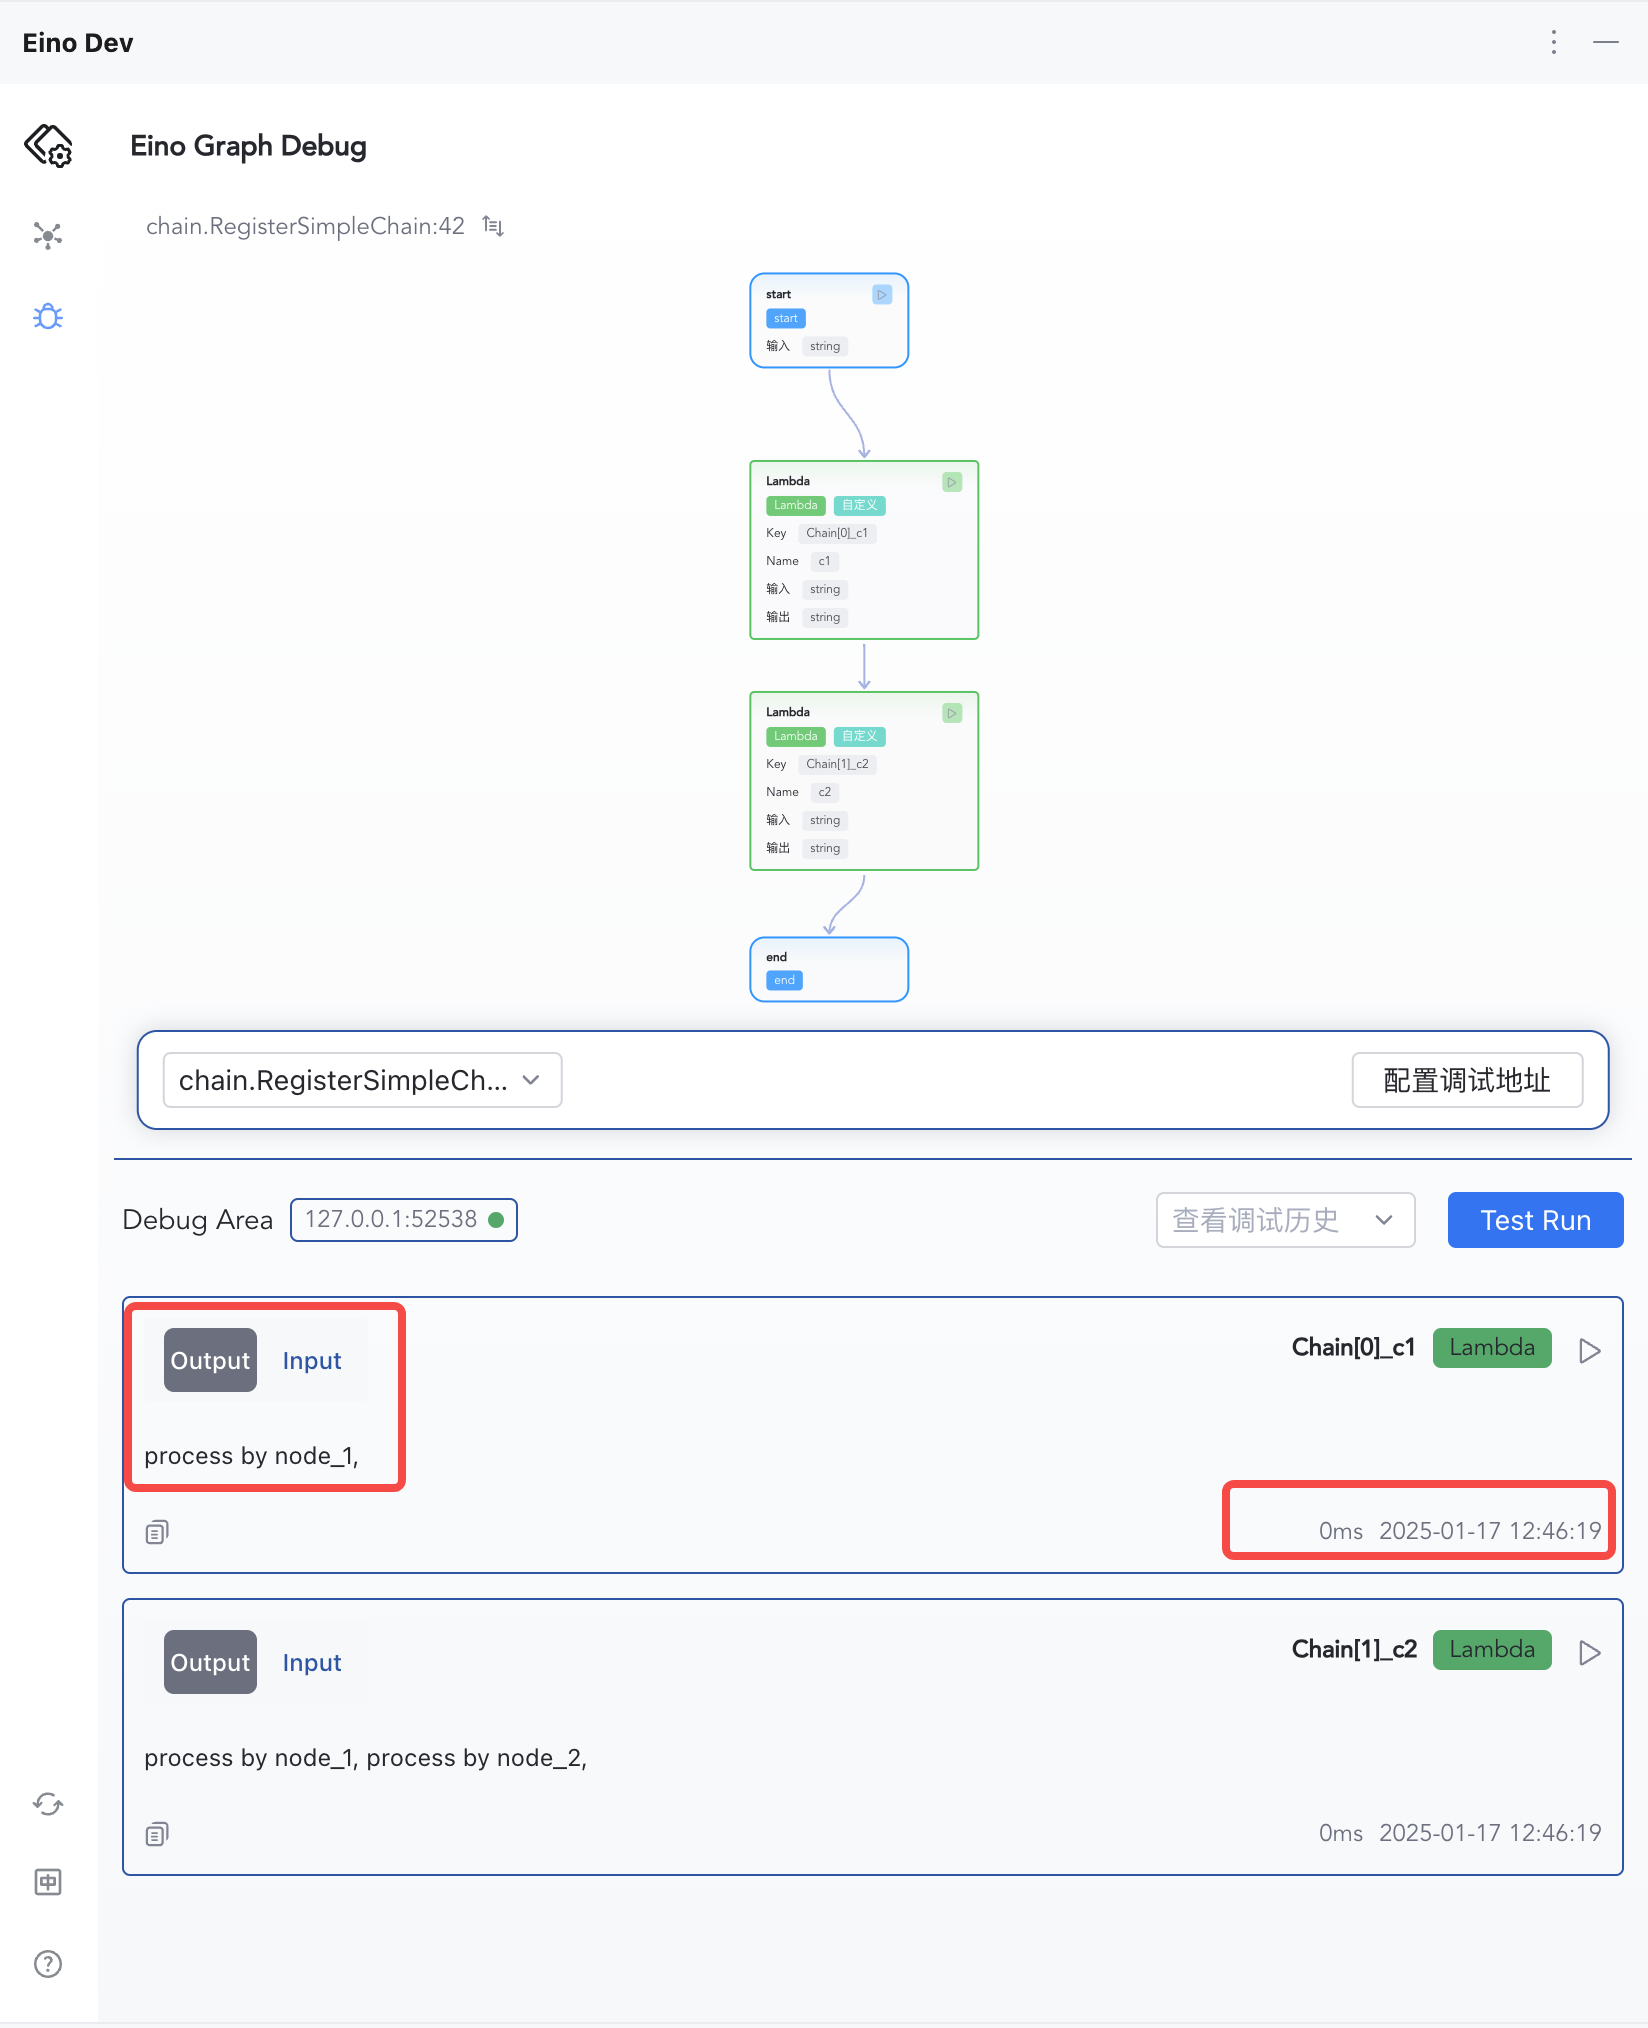 | 4.点击 Input 和 Output 切换查看节点信息
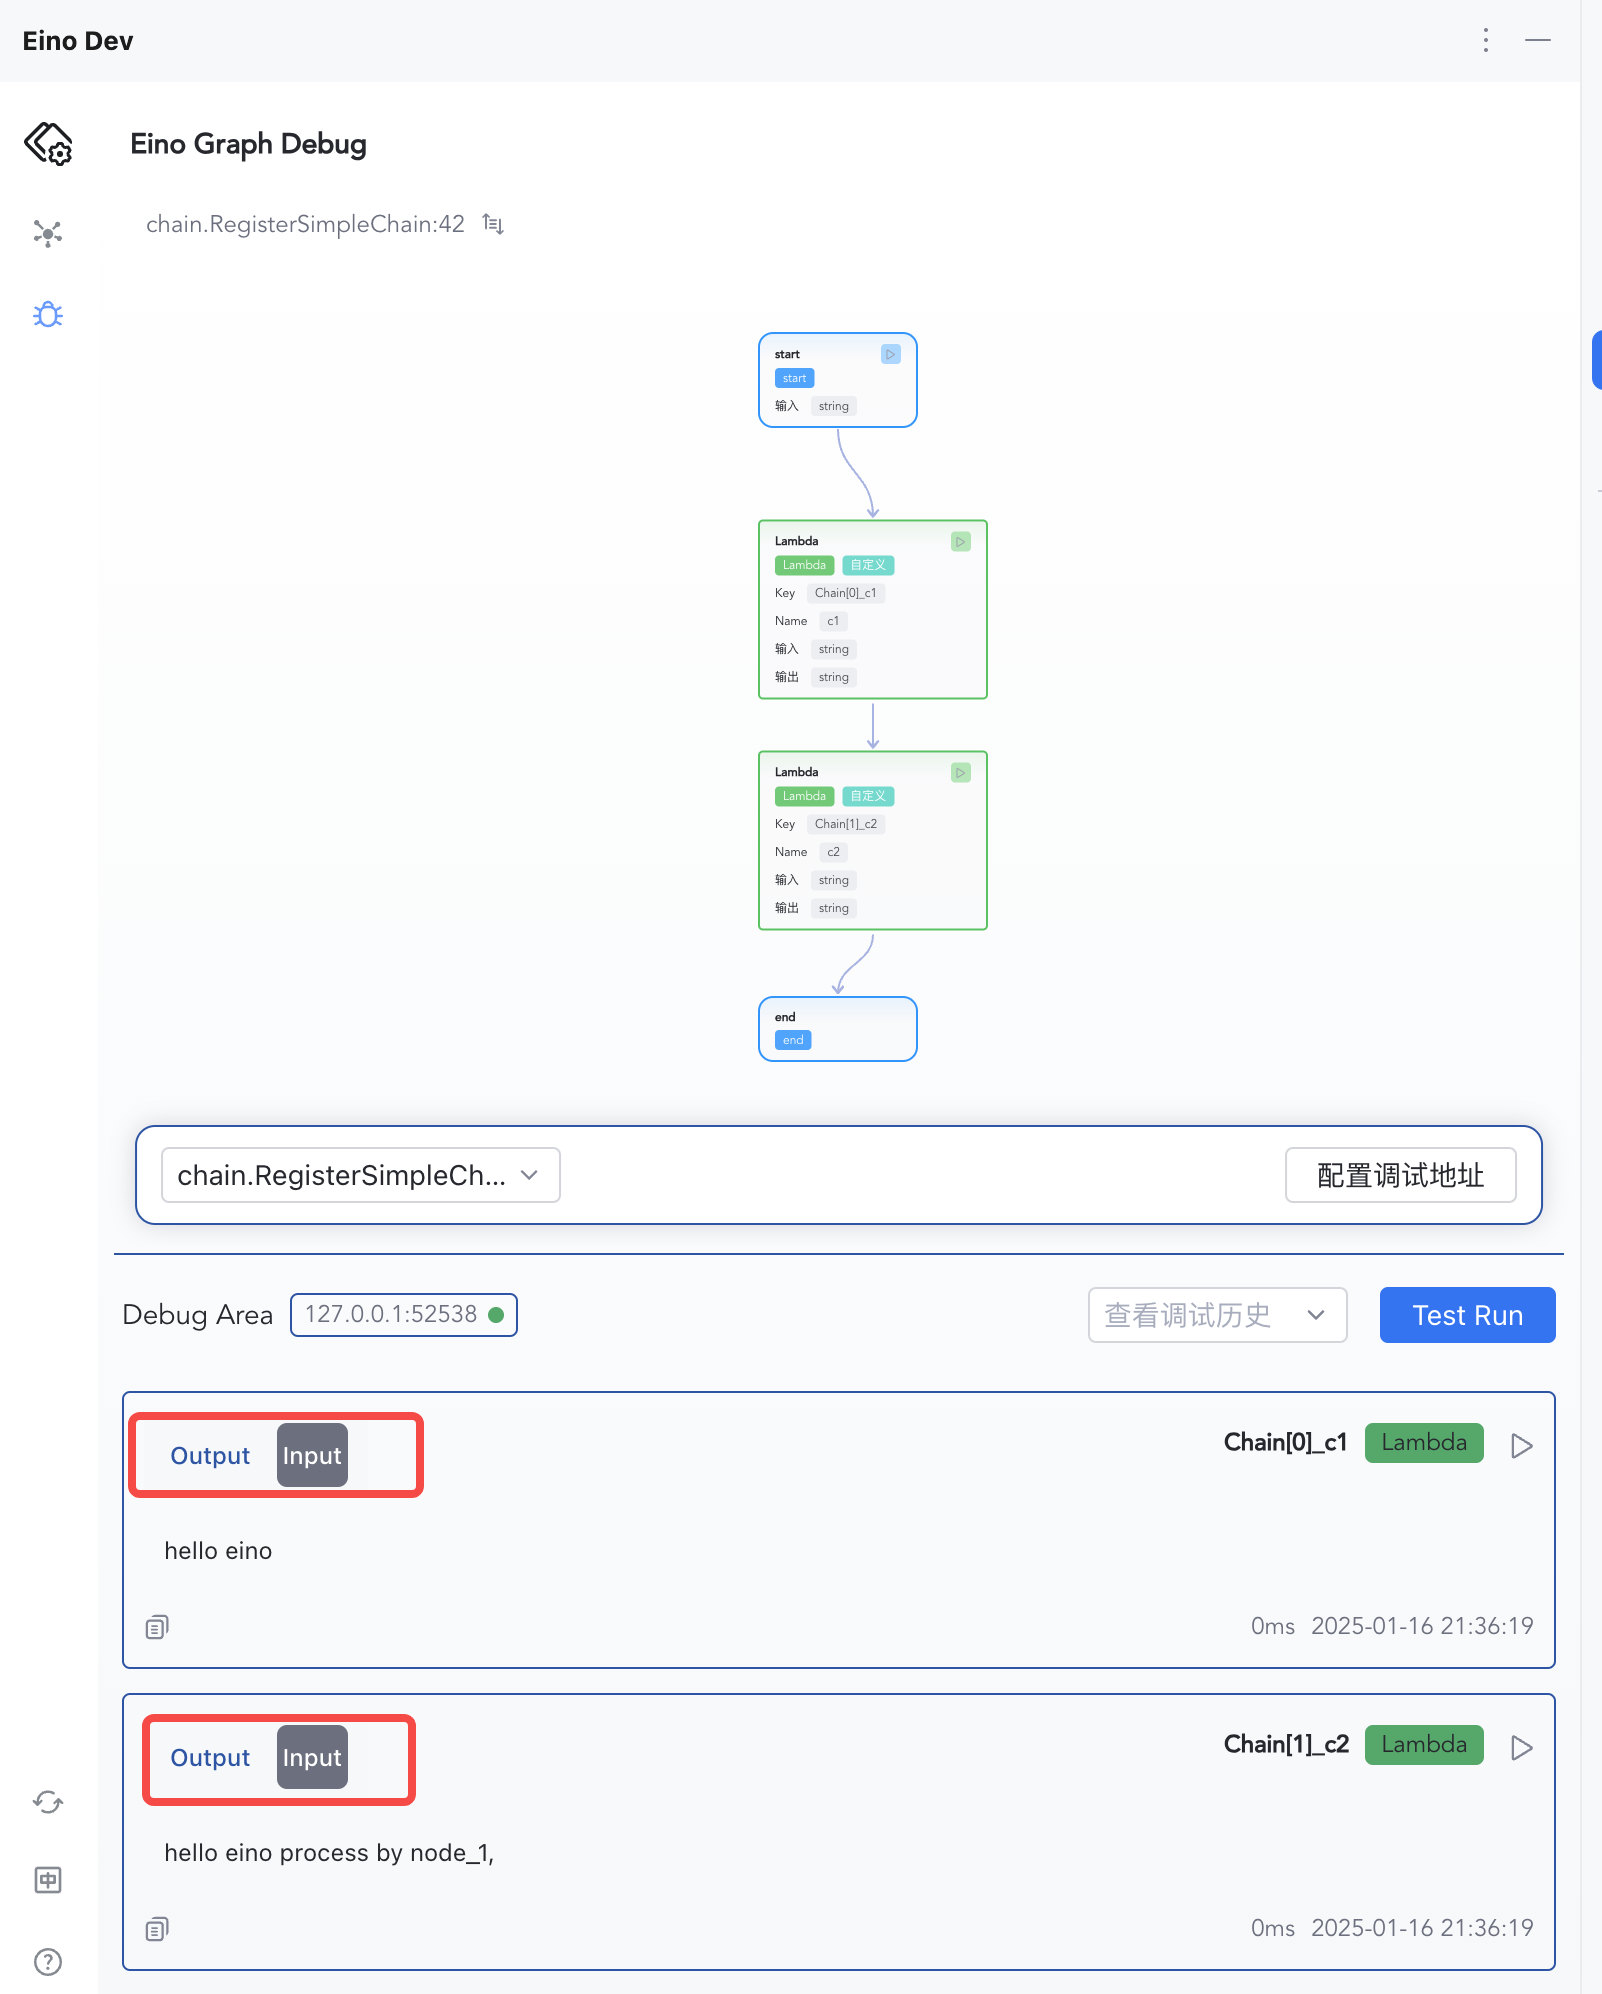 |
功能一览
本地或远程调试
目标调试编排产物无论是运行在本地电脑还是在远程服务器,都可以通过配置 IP:Port ,主动连接到目标调试对象所在的服务器。
编排拓扑可视化
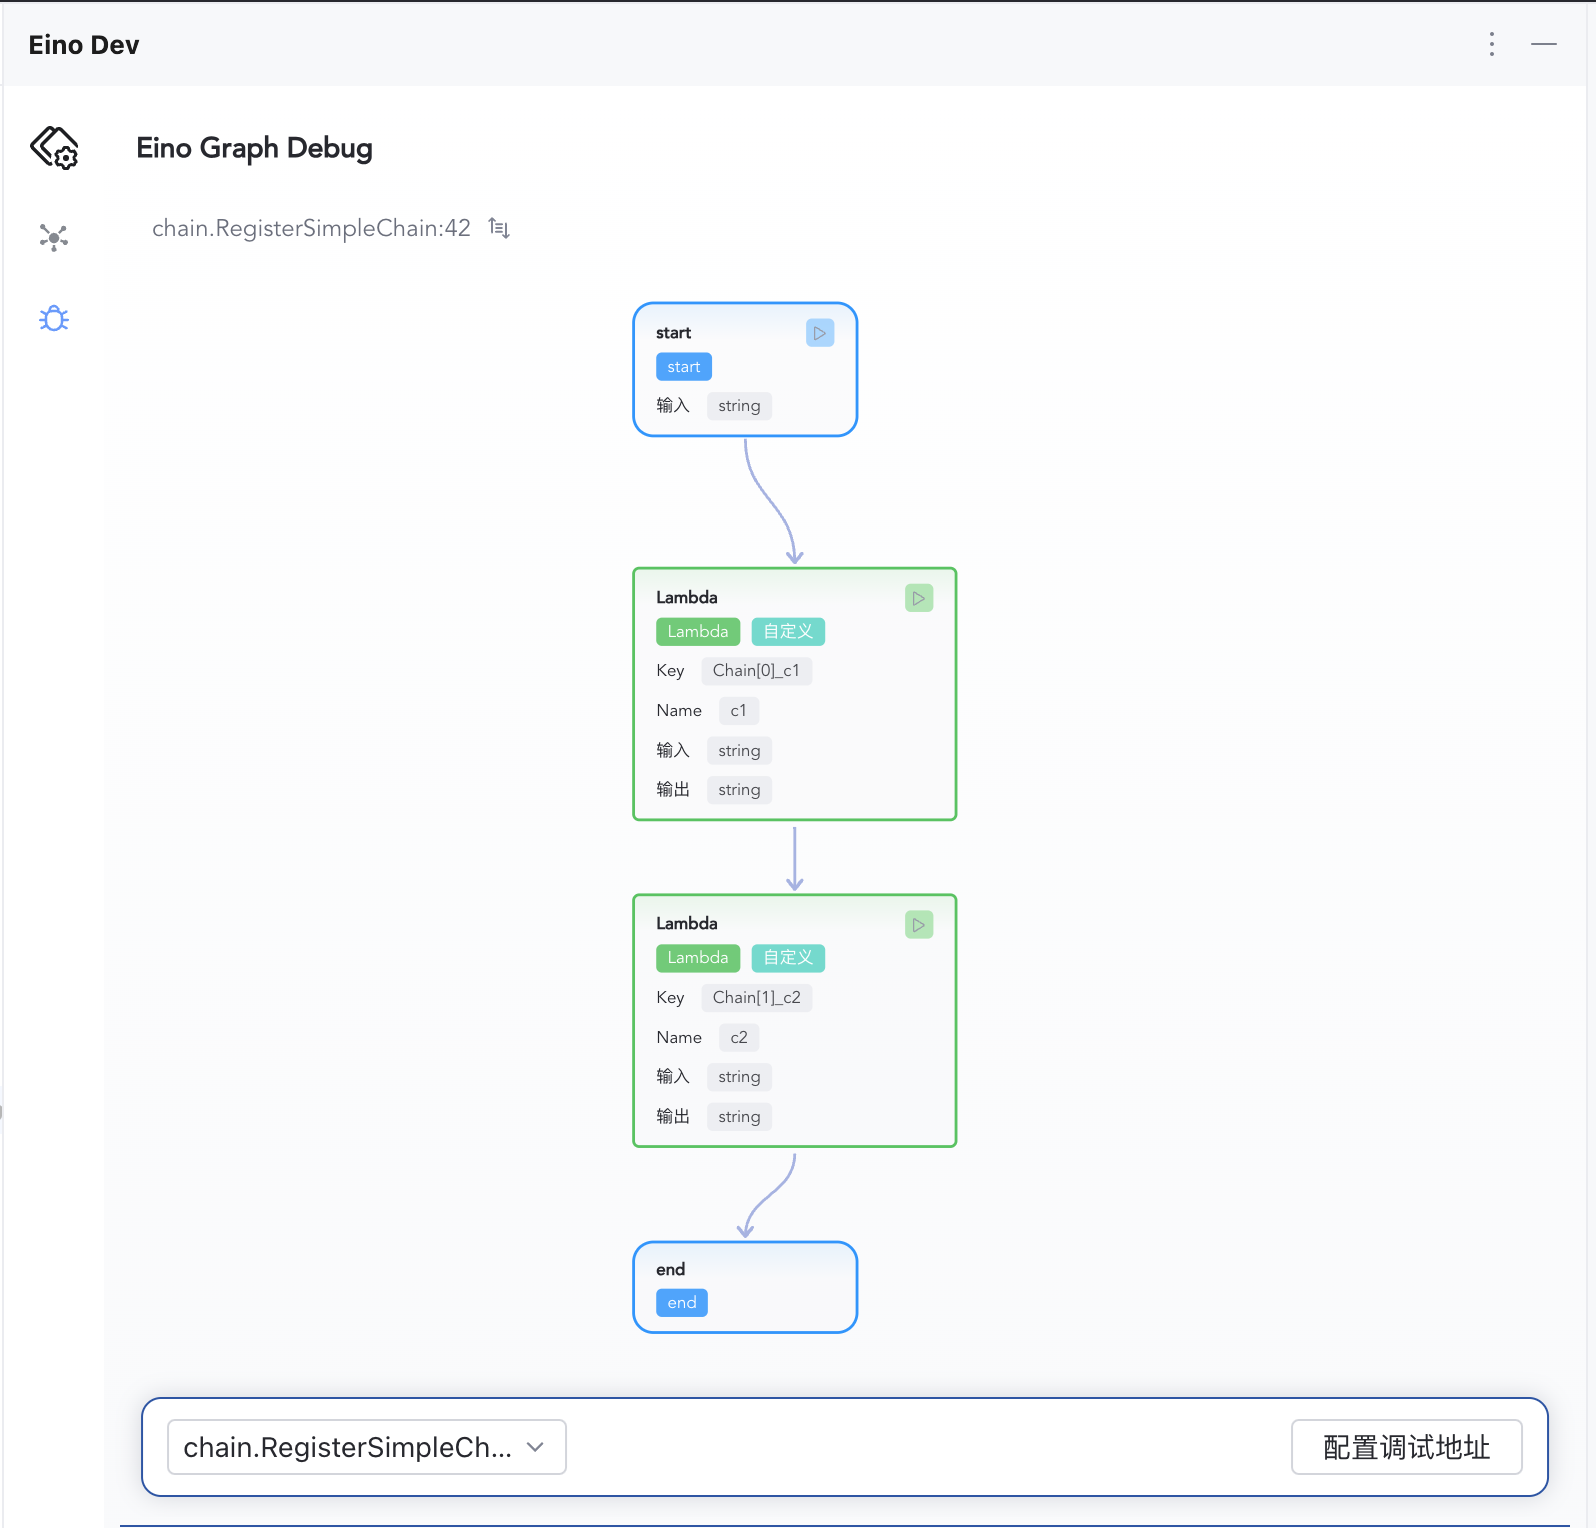
支持 Graph 和 Chain 编排拓扑可视化。
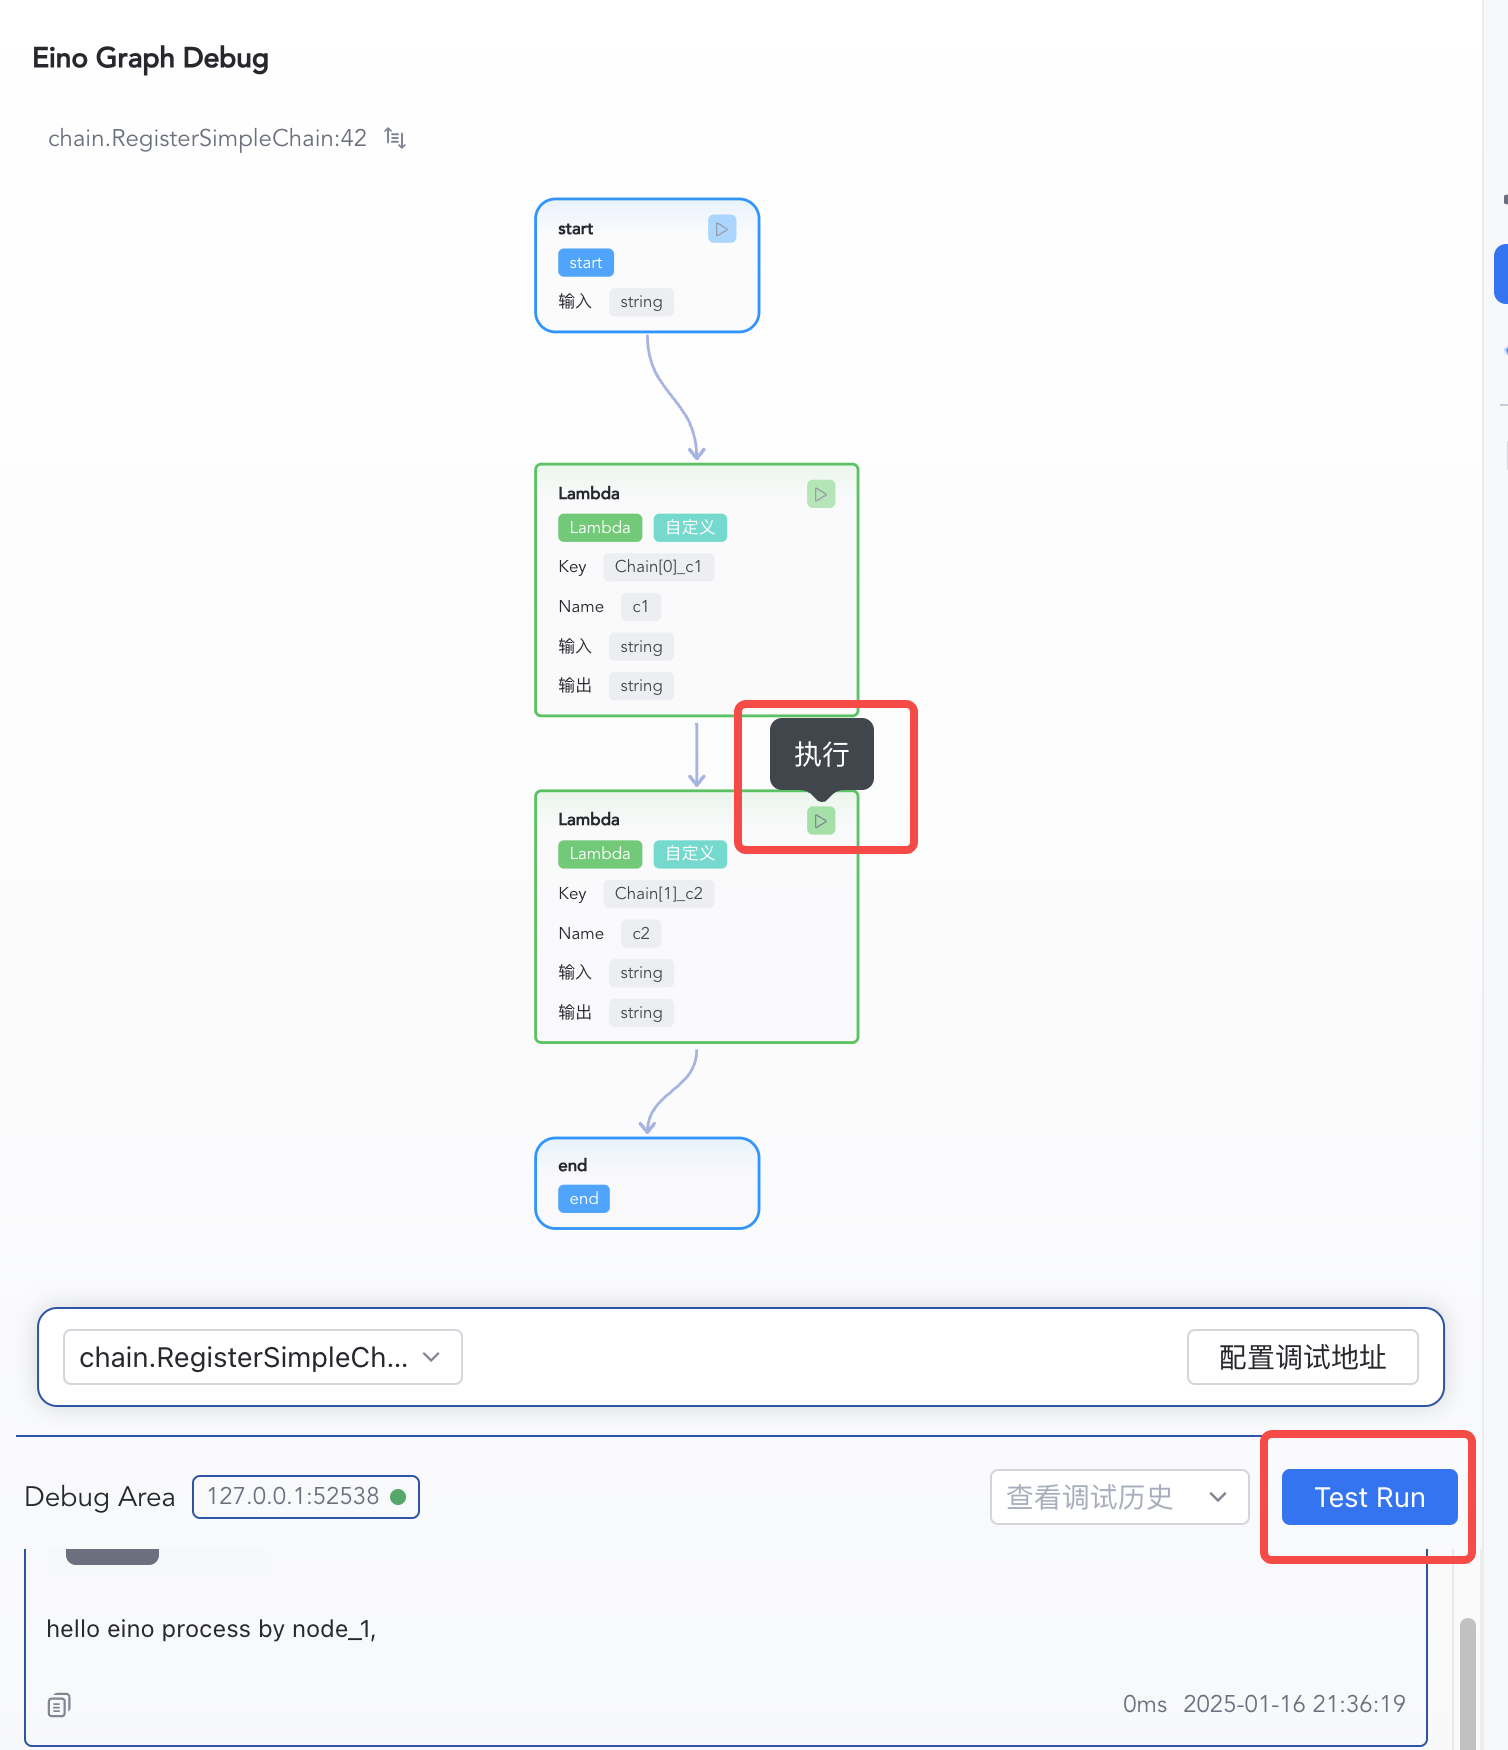
从任意节点开始调试
查看节点执行结果
每个节点执行结果都会按执行顺序展示在调试区域,包括:输入、输出、执行耗时
从零开始调试
使用 Eino 进行编排
插件支持对 Graph 和 Chain 的编排产物进行调试,假设你已经有编排代码如下
func RegisterSimpleGraph(ctx context.Context) {
    g := compose.NewGraph[string, string]()
    _ = g.AddLambdaNode("node_1", compose.InvokableLambda(func(ctx context.Context, input string) (output string, err error) {
       return input + " process by node_1,", nil
    }))
    _ = g.AddLambdaNode("node_2", compose.InvokableLambda(func(ctx context.Context, input string) (output string, err error) {
       return input + " process by node_2,", nil
    }))
    _ = g.AddLambdaNode("node_3", compose.InvokableLambda(func(ctx context.Context, input string) (output string, err error) {
       return input + " process by node_3,", nil
    }))

    _ = g.AddEdge(compose.START, "node_1")
    _ = g.AddEdge("node_1", "node_2")
    _ = g.AddEdge("node_2", "node_3")
    _ = g.AddEdge("node_3", compose.END)

    _, err := g.Compile(ctx)
    if err != nil {
       logs.Errorf("compile graph failed, err=%v", err)
       return
    }
}
安装依赖
在项目目录下依次执行以下指令
# 1. Pull latest devops repository
go get github.com/cloudwego/eino-ext/devops@latest

# 2. Cleans and updates go.mod and go.sum
go mod tidy
调用调试初始化函数
因为调试需要在用户主进程中启动一个 HTTP 服务,以用作与本地调试插件交互,所以用户需要主动调用一次 github.com/cloudwego/eino-ext/devops 中的 Init() 来启动调试服务。
💡 注意事项
- 确保目标调试的编排产物至少执行过一次
Compile()。devops.Init()的执行必须要在调用Compile()之前。- 用户需要保证
devops.Init()执行后主进程不能退出。
如在 main() 函数中增加调试服务启动代码
// 1.调用调试服务初始化函数
err := devops.Init(ctx)
if err != nil {
    logs.Errorf("[eino dev] init failed, err=%v", err)
    return
}

// 2.编译目标调试的编排产物
RegisterSimpleGraph(ctx)
运行用户进程
在本地电脑或者远程环境中运行你的进程,并保证主进程不会退出。
在 github.com/cloudwego/eino-examples/devops/debug/main.go 中,main() 代码如下
func main() {
    ctx := context.Background()
    // Init eino devops server
    err := devops.Init(ctx)
    if err != nil {
       logs.Errorf("[eino dev] init failed, err=%v", err)
       return
    }

    // Register chain, graph and state_graph for demo use
    chain.RegisterSimpleChain(ctx)
    graph.RegisterSimpleGraph(ctx)
    graph.RegisterSimpleStateGraph(ctx)

    // Blocking process exits
    sigs := make(chan os.Signal, 1)
    signal.Notify(sigs, syscall.SIGINT, syscall.SIGTERM)
    <-sigs

    // Exit
    logs.Infof("[eino dev] shutting down\n")
}
配置调试地址
- IP:用户进程所在服务器的 IP 地址。
- 用户进程运行在本地电脑,则填写
127.0.0.1; - 用户进程运行在远程服务器上,则填写远程服务器的 IP 地址,兼容 IPv4 和 IPv6 。
- 用户进程运行在本地电脑,则填写
- Port:调试服务监听的端口,默认是
52538,可通过 「WithDevServerPort」 这一 option 方法进行修改
💡 注意事项
- 本地电脑调试:系统可能会弹出网络接入警告,允许接入即可。
- 远程服务器调试:需要你保证端口可访问。
IP 和 Port 配置完成后,点击确认,调试插件会自动连接到目标调试服务器。如果成功连接,连接状态指示器会变成绿色。
选择目标调试编排产物
确保你目标调试的编排产物至少执行过一次 Compile()。因为调试设计是面向编排产物实例,所以如果多次执行 Compile(),会在调试服务中注册多个编排产物,继而在选择列表中看到多个可调试目标。
开始调试
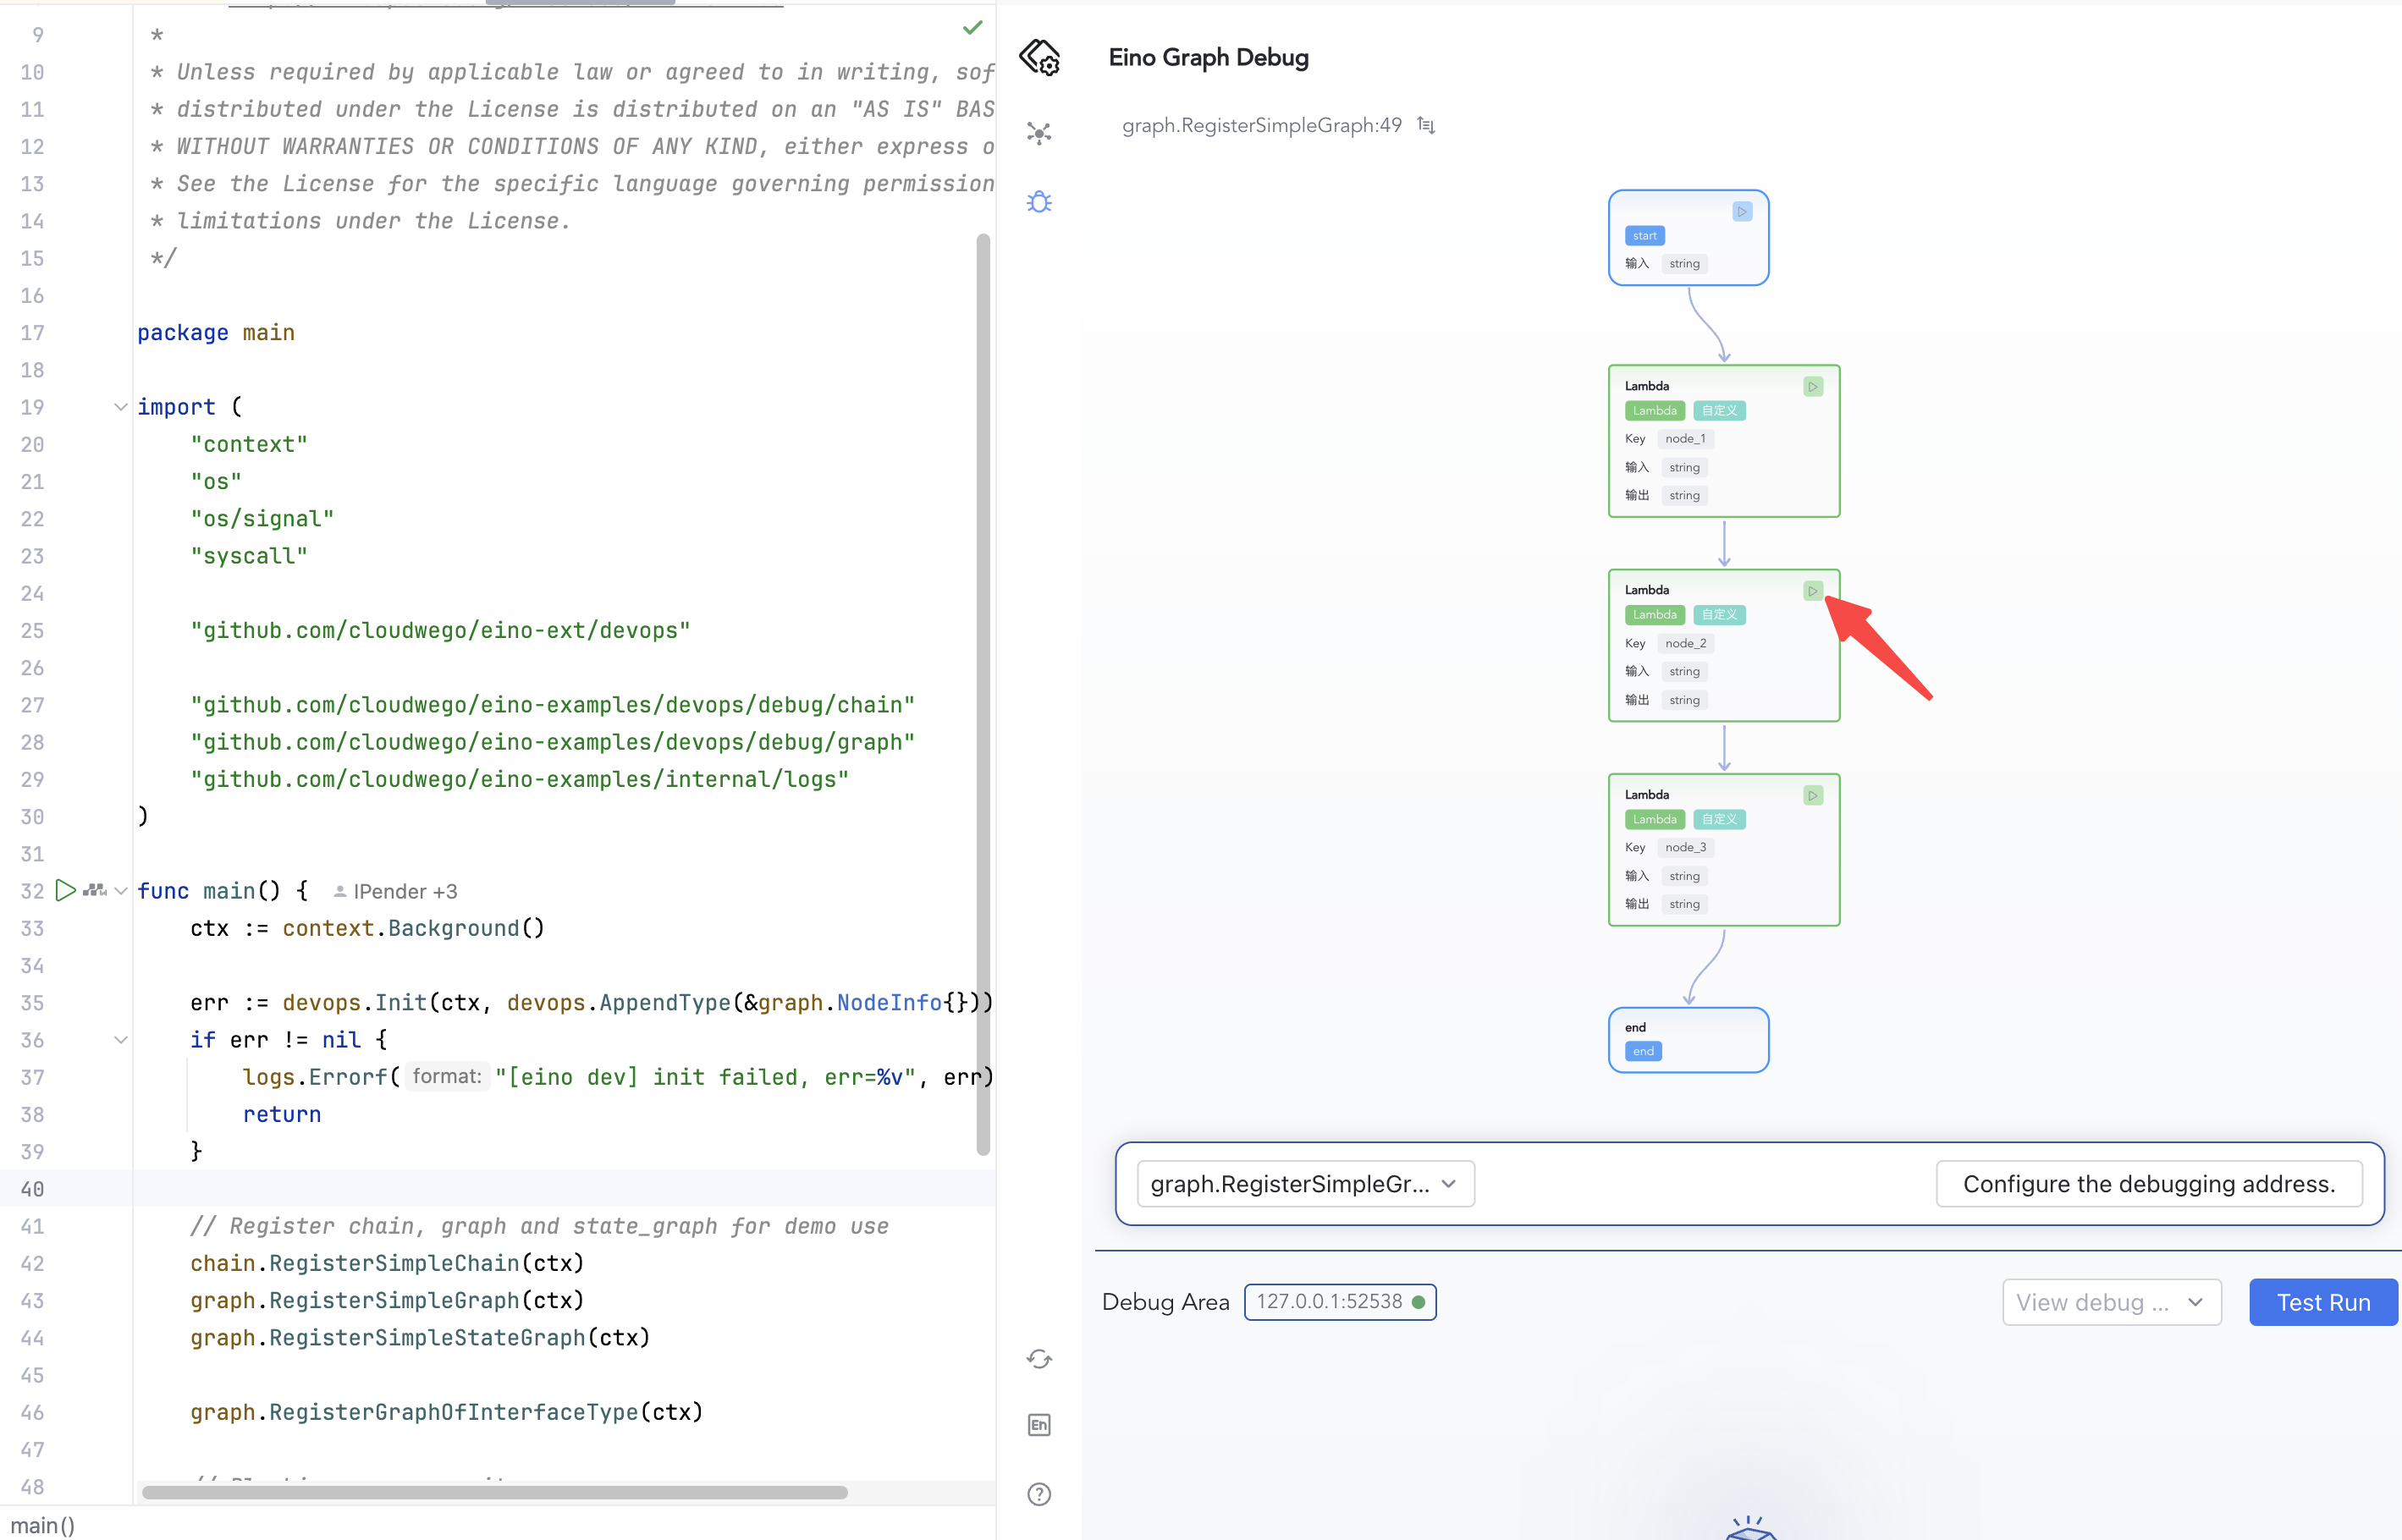
调试支持从任意节点开始调试,包括 start 节点和其他中间节点。
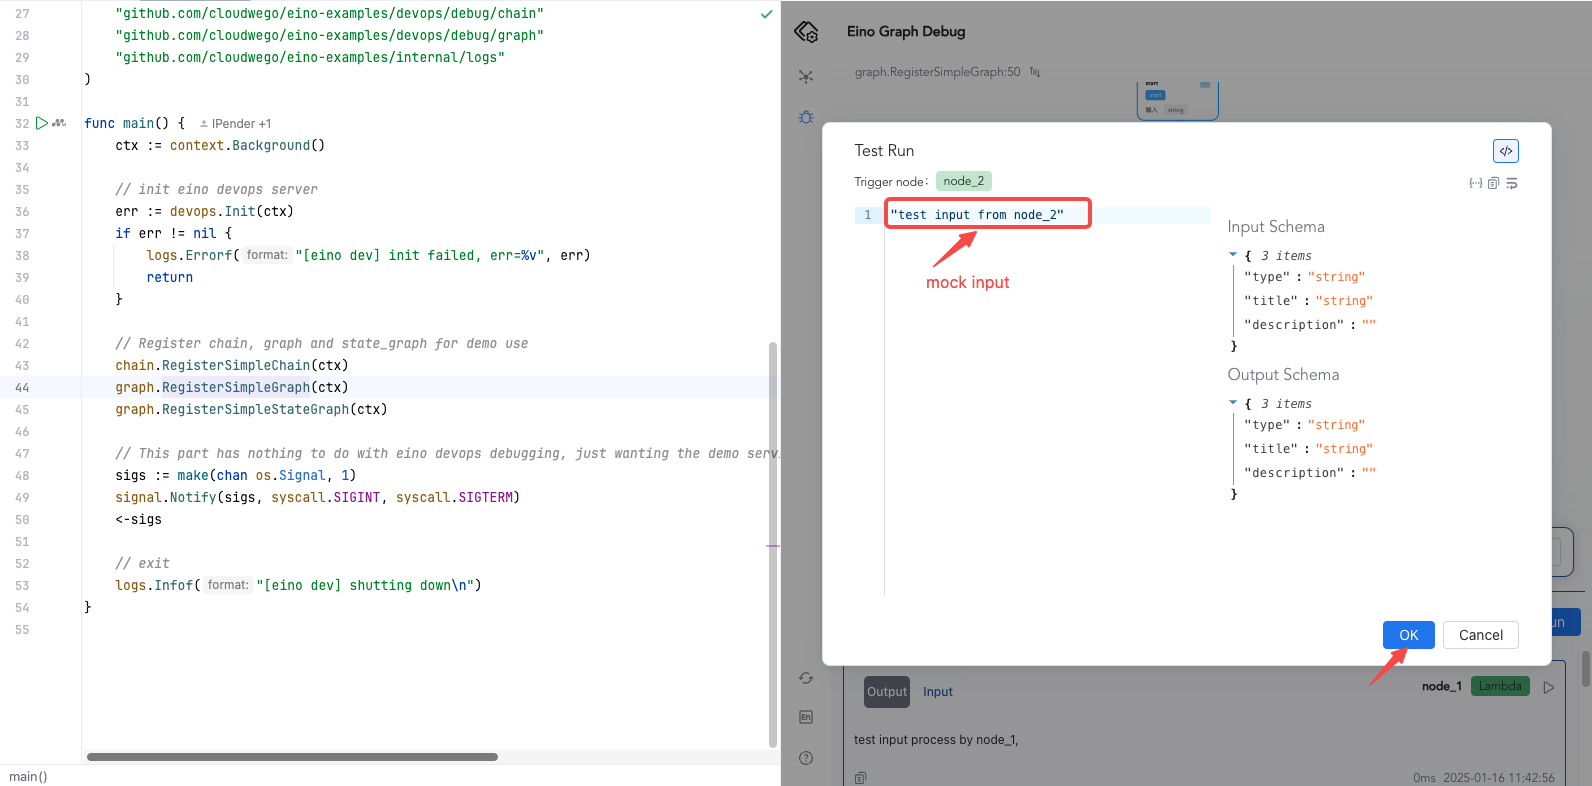
- 从 START 节点开始调试:直接点击 「Test Run」,然后输入 mock 的 input(如果 input 是复杂结构的话,会自动对 input 的结构进行推断)然后点击确定,开始执行你的 graph,每个 node 的结果会在下方显示。
- 从任意的可操作节点开始调试:比如,从第二个节点开始执行。
查看执行结果
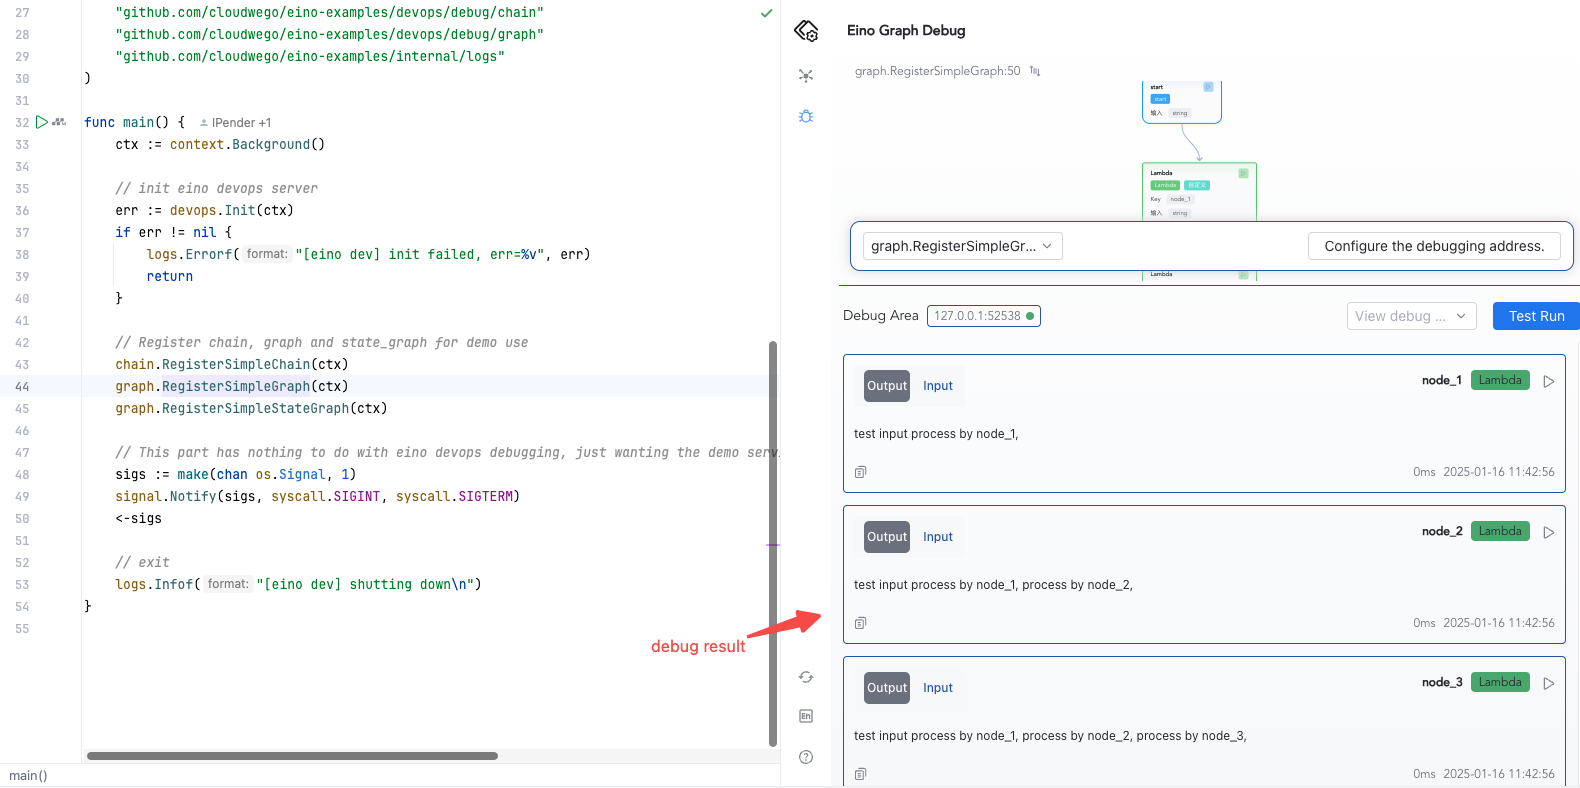
从 START 节点开始调试,点击 Test Run 后,在插件下方查看调试结果。
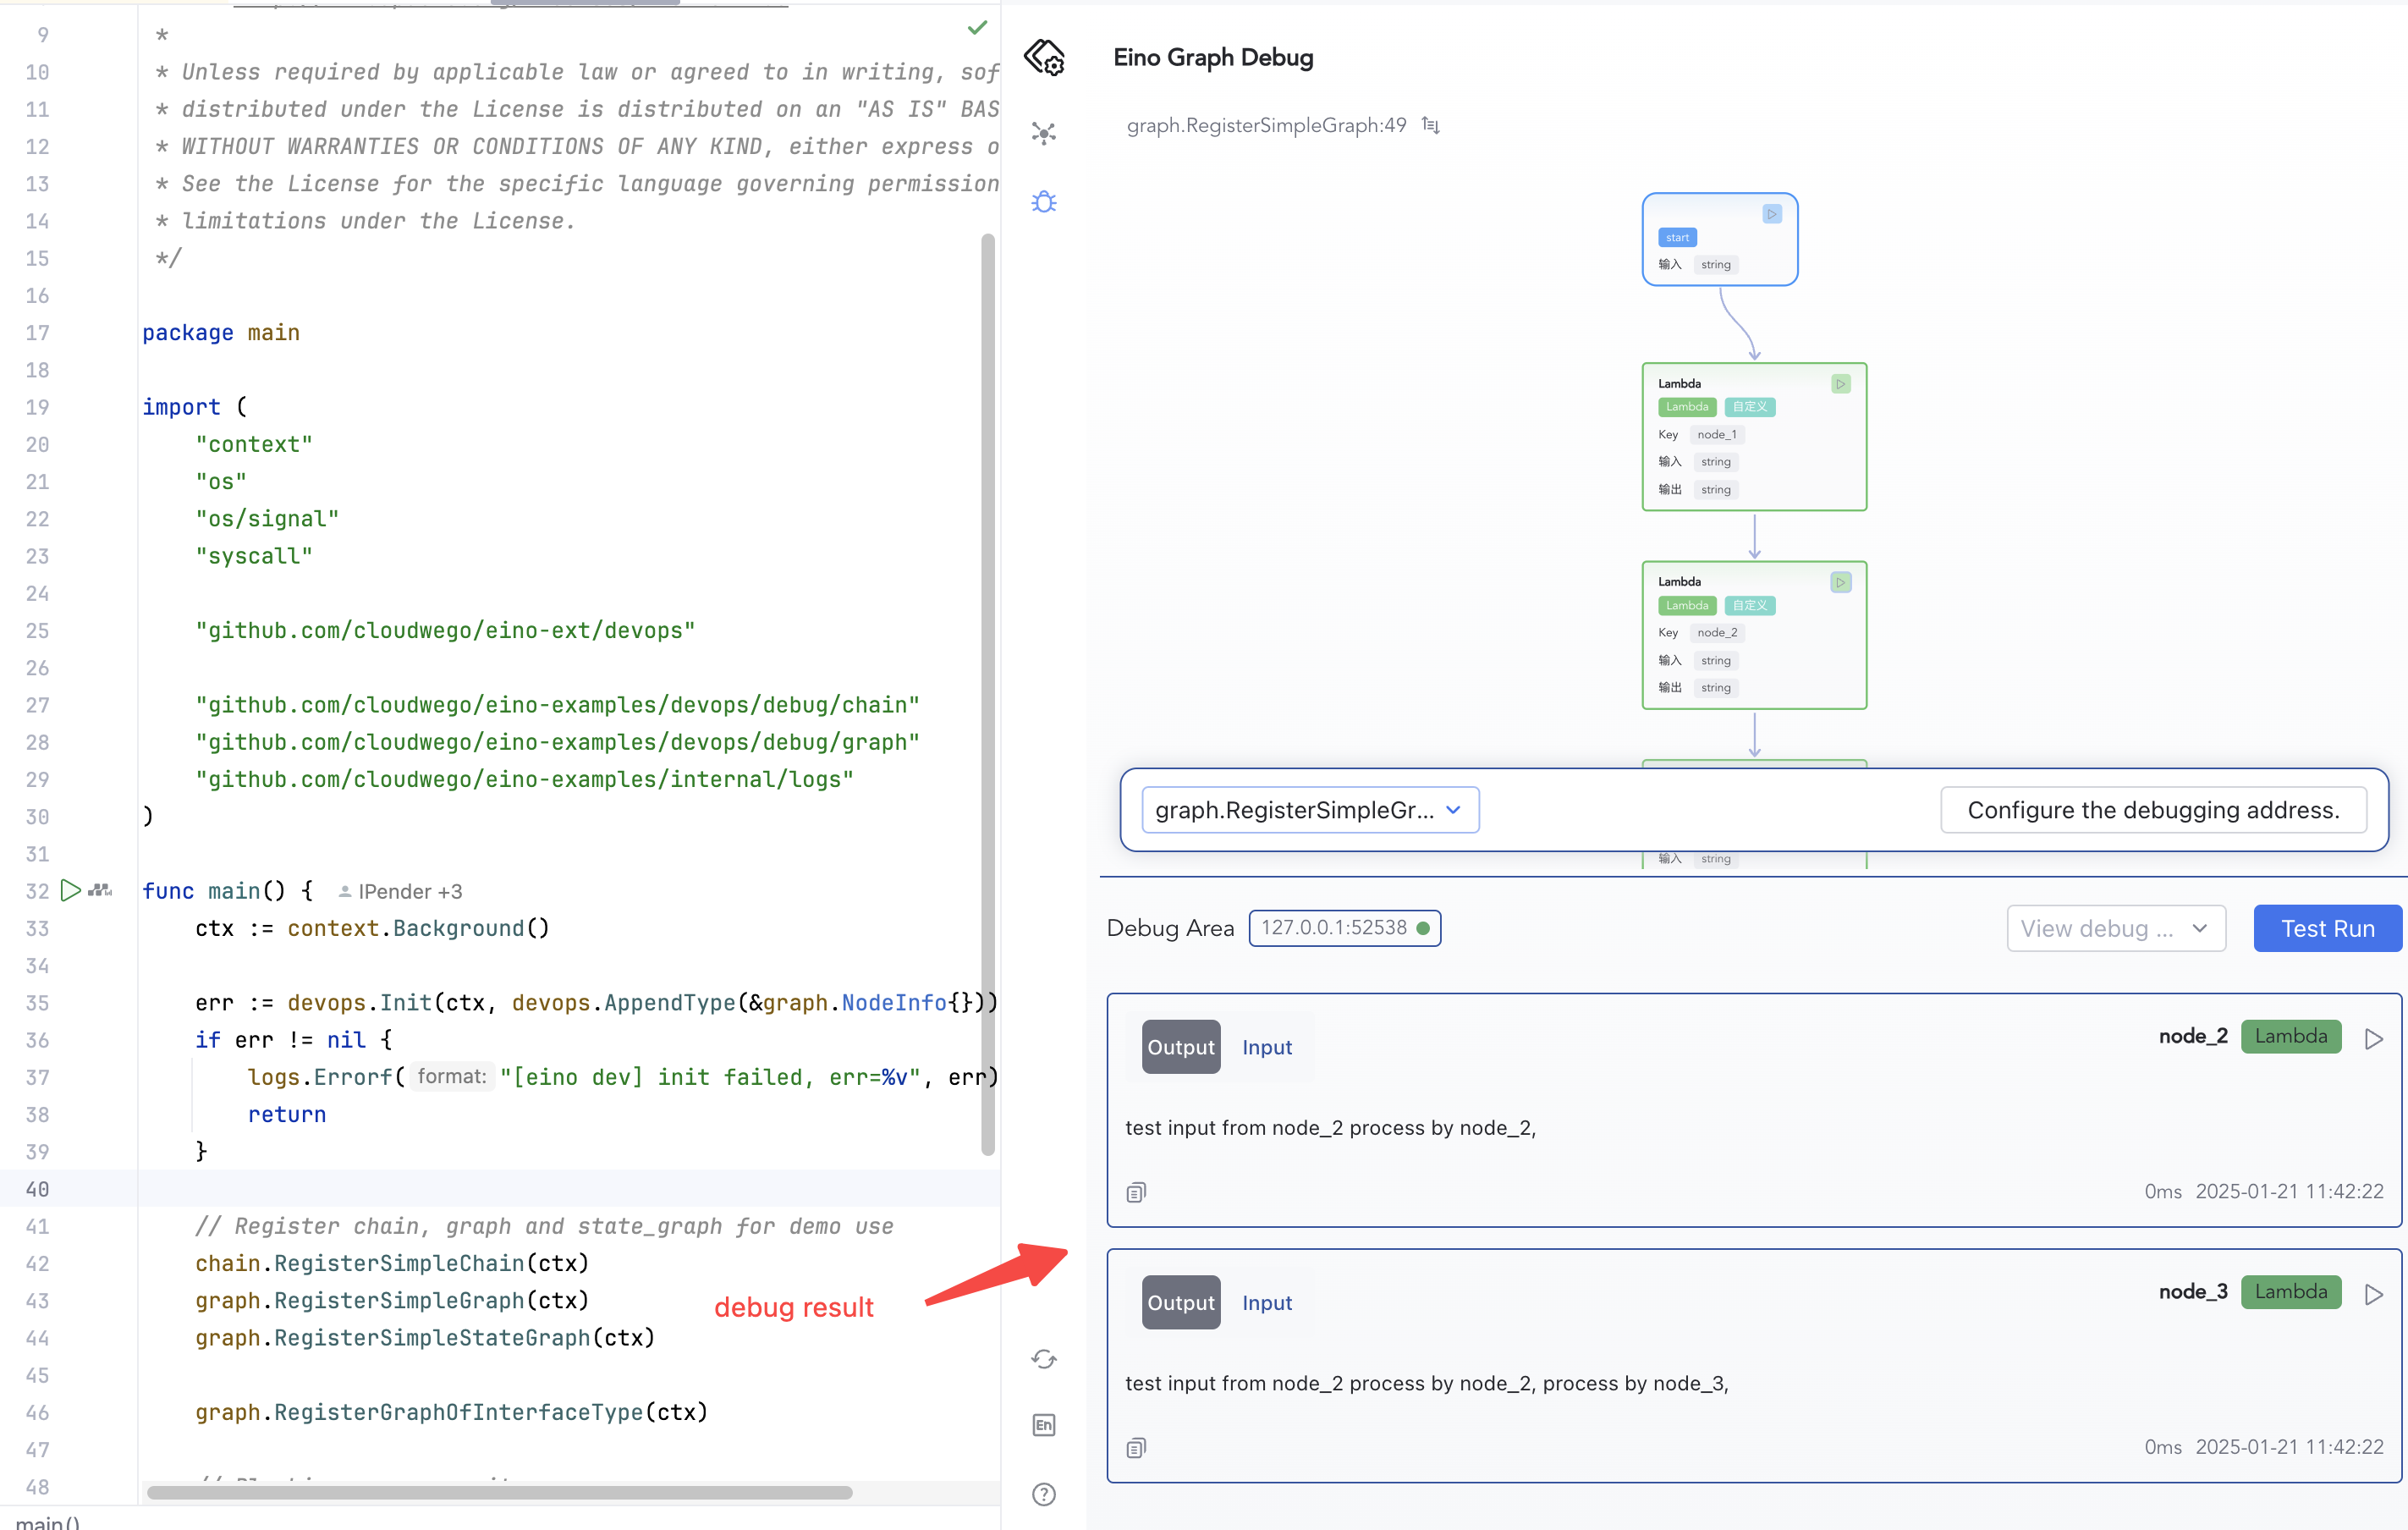
从任意的可操作节点进行调试,在插件下方查看调试结果。
高阶功能
指定 interface 字段的实现类型
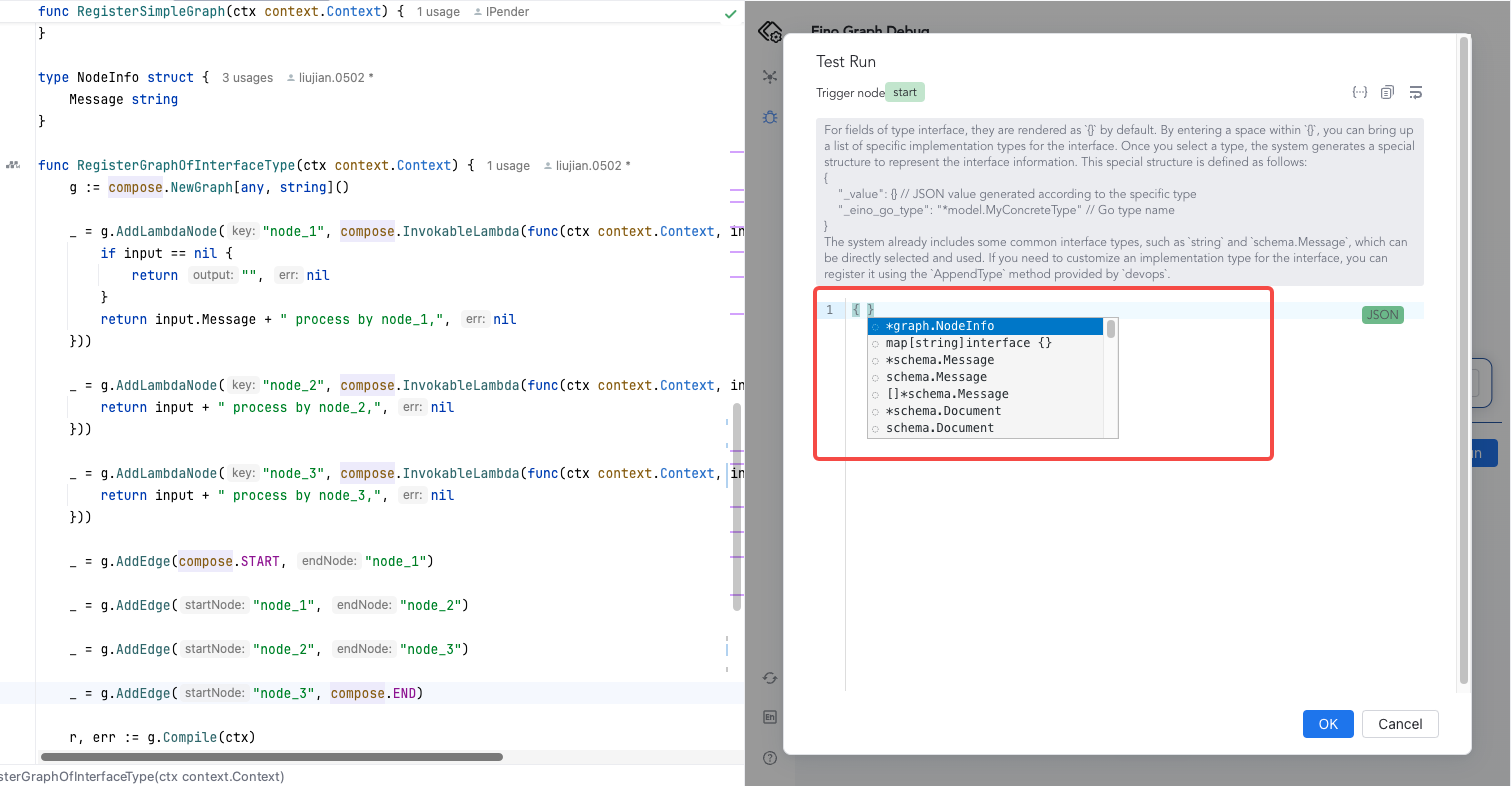
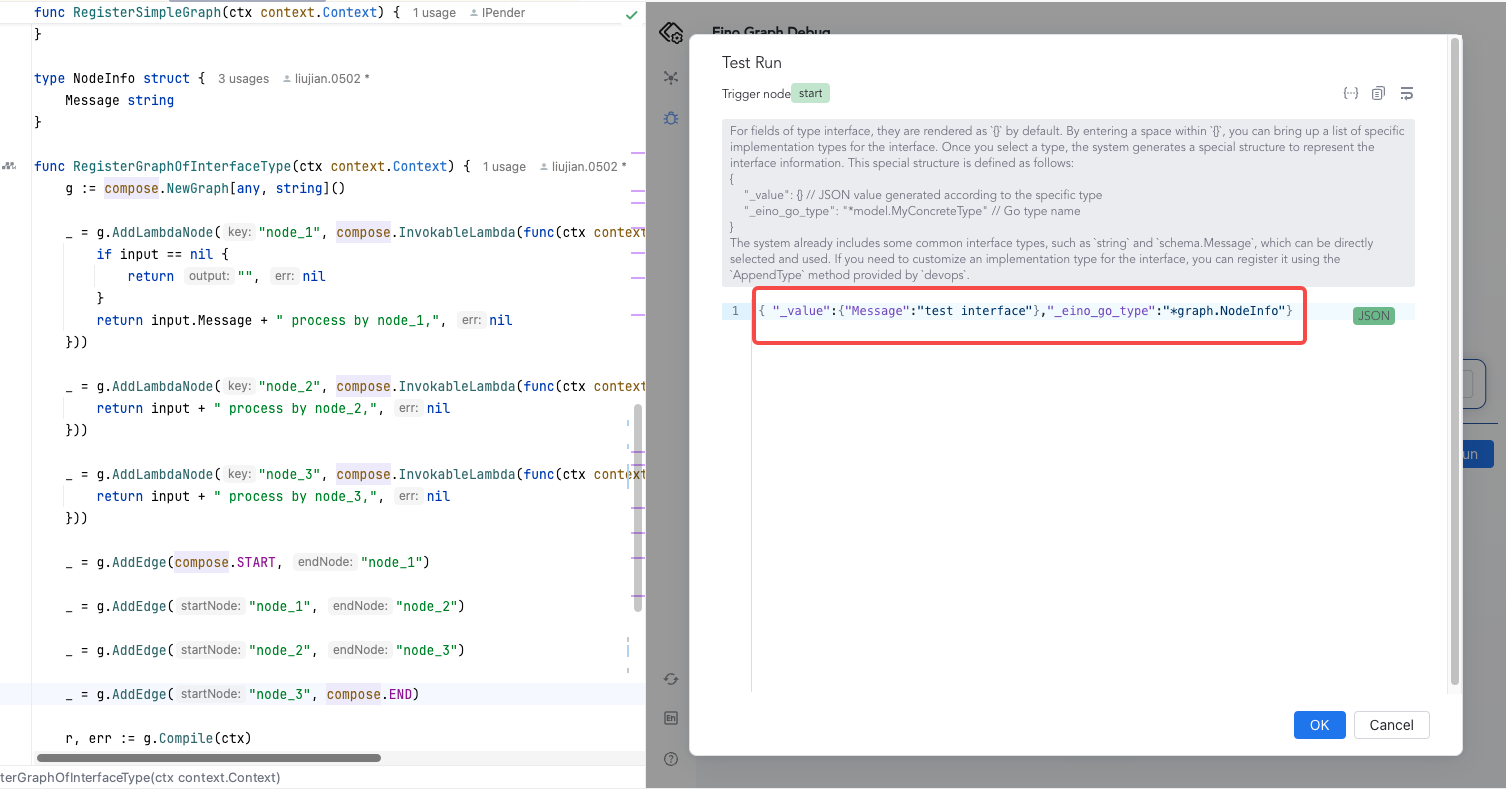
对于 interface 类型的字段,会被默认渲染为 {} 。在 {} 中输入空格可唤出 interface 实现类型的列表,选中某个类型后,系统会生成一个特殊的结构体以表达 interface 的信息;该特殊结构体定义如下:
{
    "_value": {} // 按具体类型生成的 json value
    "_eino_go_type": "*model.MyConcreteType" // Go 类型名
}
💡 系统内已经内置了一些常见的 interface 类型,如
string、schema.Message等,可直接选择使用。如果需要自定义 interface 实现类型,可通过devops提供的AppendType方法进行注册。
假设你已经有编排代码如下,其中,graph 的输入定义为
any,node_1的输入定义为*NodeInfo;type NodeInfo struct { Message string } func RegisterGraphOfInterfaceType(ctx context.Context) { // Define a graph that input parameter is any. g := compose.NewGraph[any, string]() _ = g.AddLambdaNode("node_1", compose.InvokableLambda(func(ctx context.Context, input *NodeInfo) (output string, err error) { if input == nil { return "", nil } return input.Message + " process by node_1,", nil })) _ = g.AddLambdaNode("node_2", compose.InvokableLambda(func(ctx context.Context, input string) (output string, err error) { return input + " process by node_2,", nil })) _ = g.AddLambdaNode("node_3", compose.InvokableLambda(func(ctx context.Context, input string) (output string, err error) { return input + " process by node_3,", nil })) _ = g.AddEdge(compose._START_, "node_1") _ = g.AddEdge("node_1", "node_2") _ = g.AddEdge("node_2", "node_3") _ = g.AddEdge("node_3", compose._END_) r, err := g.Compile(ctx) if err != nil { logs.Errorf("compile graph failed, err=%v", err) return } }调试前,通过
AppendType方法在Init()时注册自定义的*NodeInfo类型:err := devops.Init(ctx, devops.AppendType(&graph.NodeInfo{}))调试过程中,在 Test Run 的 Json 输入框中,对于 interface 类型的字段,默认会呈现为
{}。可以通过在{}中键入一个空格,来查看所有内置的以及自定义注册的数据类型,并选择该 interface 的具体实现类型。
- 在
_value字段中补全调试节点输入。
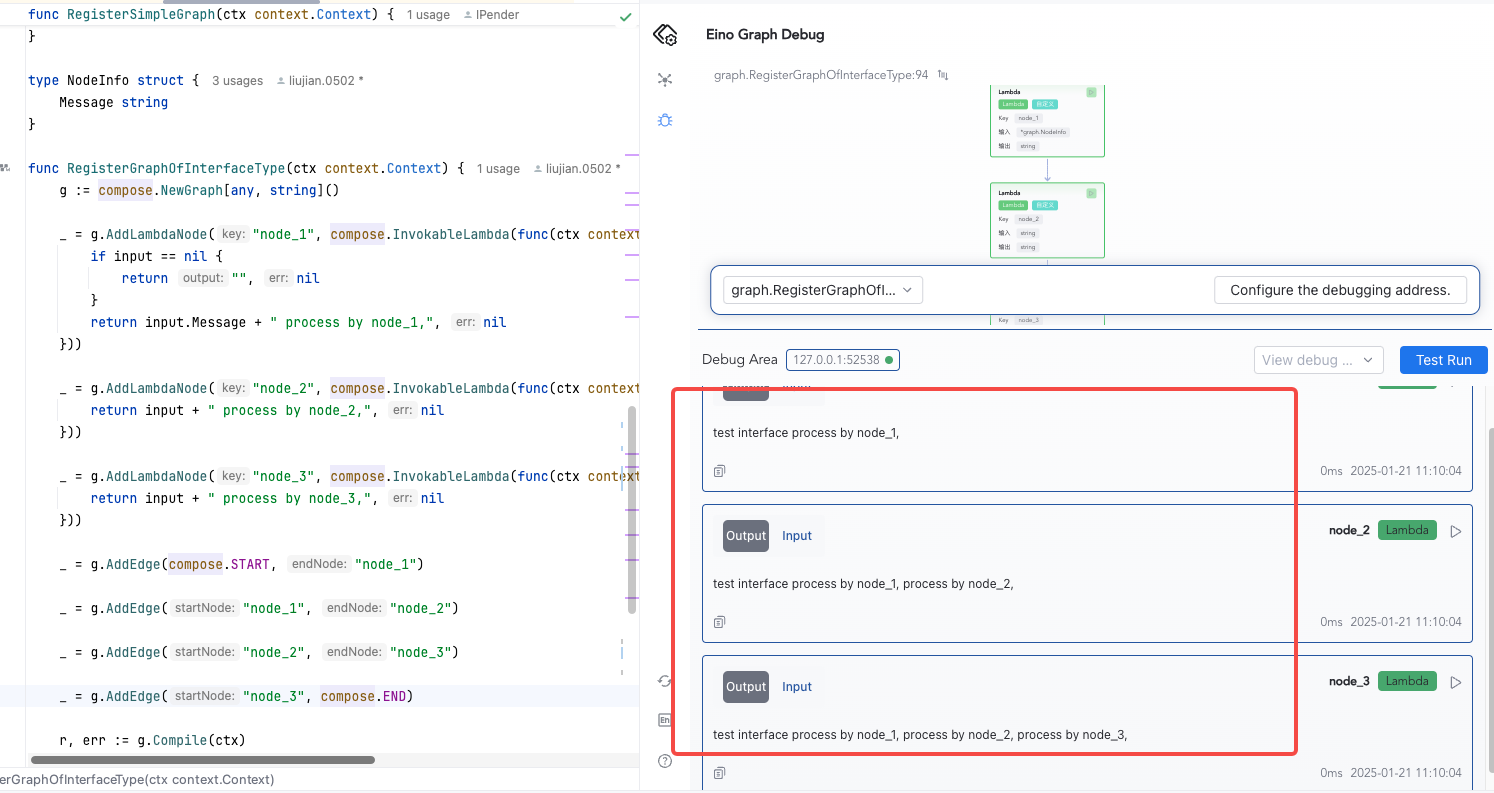
- 点击确认,查看调试结果。
